colouring stamens for flowers

Colouring stamens for flowers

colouring stamensColouring stamens for flowers made easy!

Although ready made stamens come in a variety of colours and sizes is is often difficult to find ones in suitable colour for a project in question. That’s why I find it easier to colour white stamens myself. This way I make sure that the stamens match my flower in colour and size.

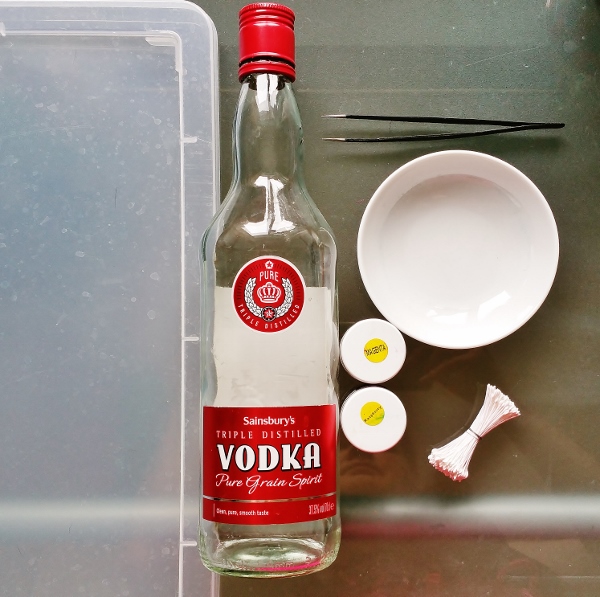
For dyeing stamens we’ll need:
– non porous surface (plastic or glass)
– some vodka (or even better spirit)
– Procion (acid) dyes in chosen colours
– a receptacle (a porcelain dish)
– a pair of tweezers
– a bunch of stamens

Vodka evaporates quicker than water which means the dye will dry before the stamen heads dissolve in the licolouring stamens
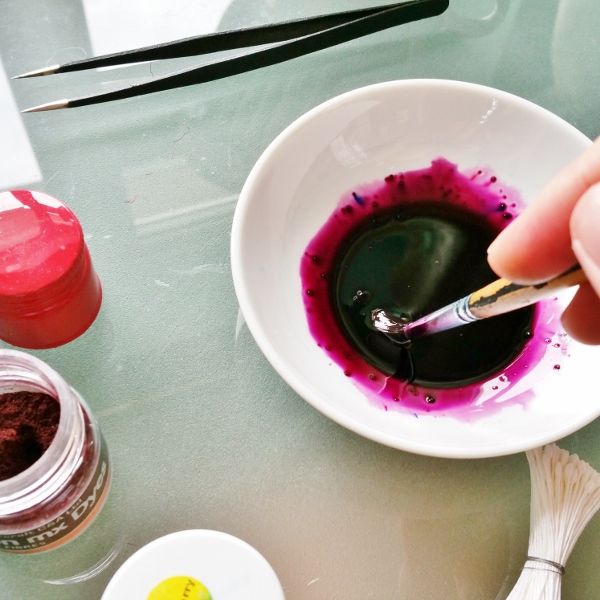
quid. Water is not as good for this task and even with vodka one should act really quickly.


Pour a small quantity of vodka (10-15 ml) into the dish and dissolve some powder dye in it. I find intense colours work better, that’s why I put a generous amount of powder dye into the dish. colouring stamens
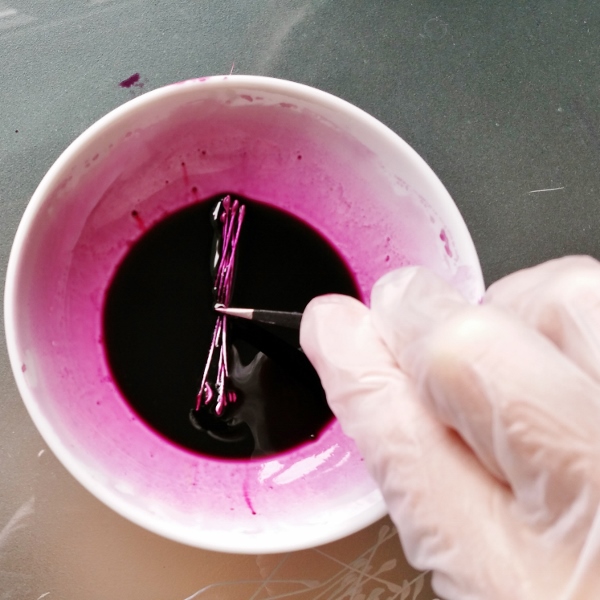
Using a brush dissolve the dye well in vodka. It will take a bit longer than dissolving the dye in water, so make sure all the dye grains are dissolved.


Now using a pair of tweezers ( and possibly disposable gloves) dip several stamens at a time into the prepared dye and dye them evenly. Do not try to put all of the stamens at once. This will only dissolve all the stamen heads and ruin the stamens.


colouring stamens
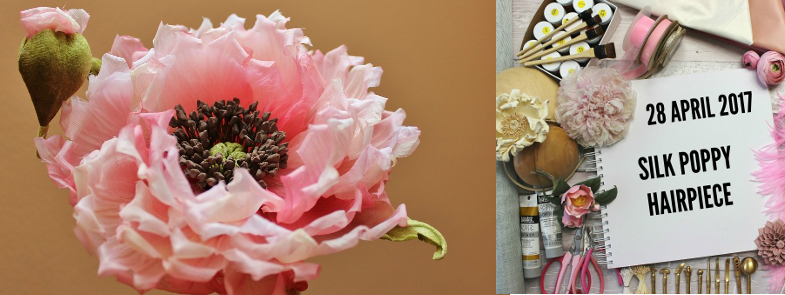
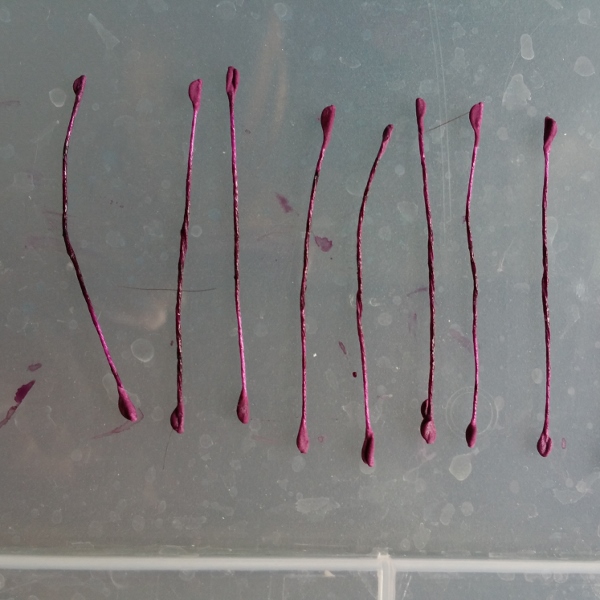
Having dyed a small bunch of stamens put them onto a prepared non porous surface like glass or plastic and leave to dry. It is important that the stamens are separated (see the photo). Otherwise they will stick together as they are drying.
In this way, portion by porting a small bunch at a time dye all the stamens and lay them out tocolouring stamens 
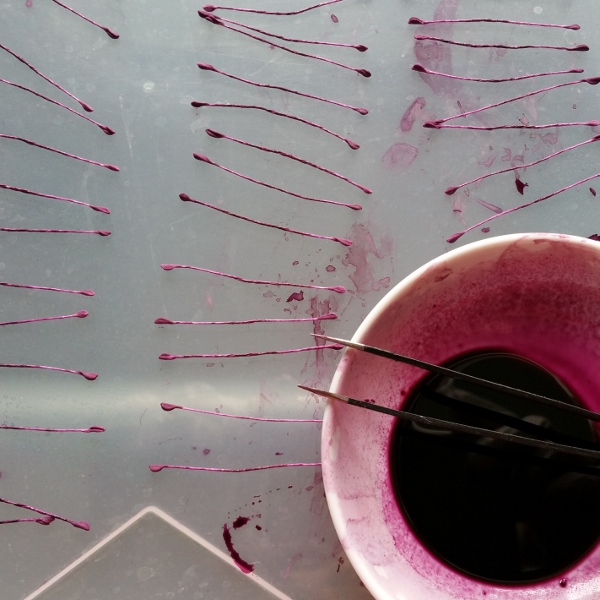
dry on the non porous surface. Please do not use paper as the wet stamens stick to it.


I hope this information on colouring stamens for flowers is useful for you and you’ll be confident to dye white stamens for your project now.


Video tutorials on flowers from £39


EXPLORE FLOWER MAKING PHOTO TUTORIALS
EXPLORE FLOWER MAKING VIDEO TUTORIALS
no tool flower making tutorials for beginners

NO TOOL flower making tutorials for beginners

shaping fabric flower petals without the use of tools 8NO tool flower making tutorials for beginners: are there any?

I am well aware of the fact that not every flower making artist (especially a beginning one) has got a set of traditional millinery tools to shape flower petals and leaves. Although this does cause serious restrictions with regards to the techniques that can be used and the final results that can be obtained, there are several methods that could be successfully applied without the use of tools and help make certain flowers. There are several no tool flower making tutorials for beginners too.
Here on my blog I am explaining how you can shape petals using a so called cold shaping method. This method works great for such flowers as peonies, poppies, irises etc.


Then of course there is a whole branch of flower making that uses artificial fabrics and their qualities. These fabrics can be singed
on the flame of a candle to be shaped into petals and leaves. This technique cannot be used for natural fabrics as they simply burn in the flame. To learn more about this technique and make a bright poppy brooch please check out our Fabric Poppy Brooch Tutorial here.


silk dandelion clock tutorial cover


Luckily some fabric flowers do not require tools simply due to their nature and the way they are. This is the case with Silk Dandelion Clock Brooch. Yes, you’ve got it right, to make a dandelion clock out of pure silk you do not need any millinery tools. We do use tools to shape the foliage in the tutorial, so if you wish you can get those tools from our website (hurry as the offer is very limited). Otherwise feel free to omit the tooling.


If you have not yet invested into a set
of tools but would really like to have a go at making flowers why not try leather blooms? The thing is, leather is such a luxurious and beautiful material to work with that often you do not need to do much before you turn it into a lovely flower. Hand shaping combined with the use of a pair of tweezers can create beautiful as well as pretty realistic flowers.


leather sunflower brooch
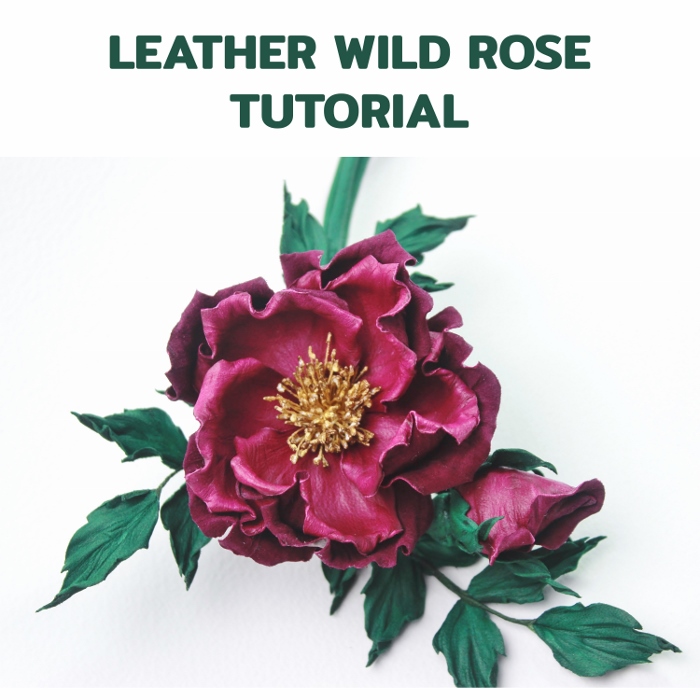
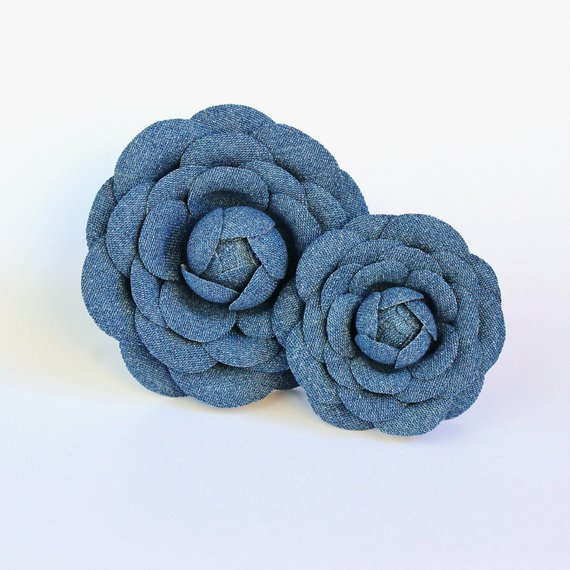
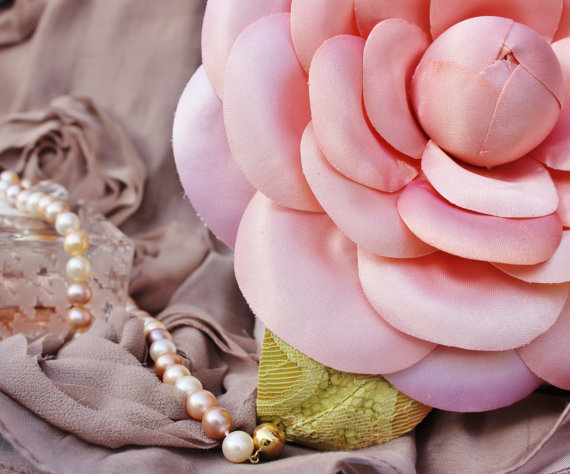
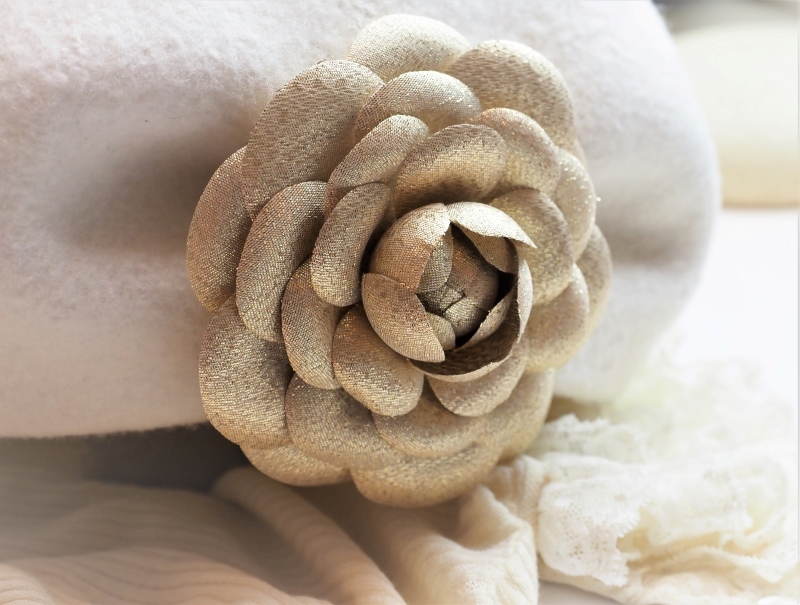
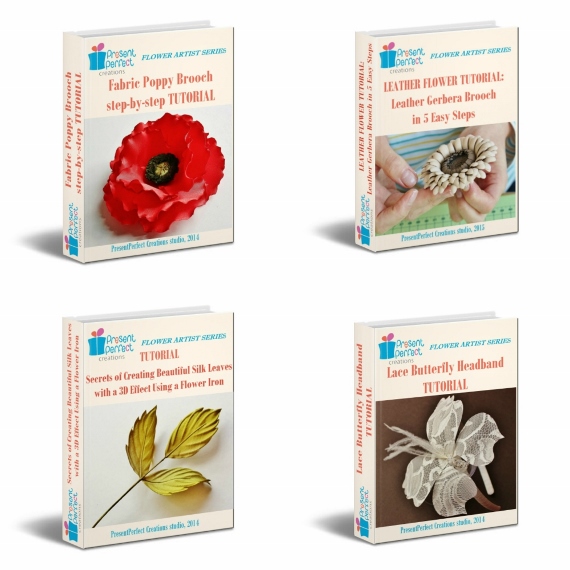
We are happy to offer 3 leather flower making tutorials that require no millinery tools, on Wild Leather Rose leather poppy flower tutorialBrooch , on Leather Sunflower Headband and on Leather Poppy Choker.
They are a good point to start from if you want to explore leather flower making
without the need to invest in a set of millinery tools.
leather grape tutorial
One of our latest no-tool leather tutorials in on the Leather Grapes. Again, using only your hands and some specialist techniques you can create a beautiful bunch of grapes in a variety of  colours and sizes to be used as a brooch, a hat trim or another accessory.
To learn more about the Leather Grape Tutorial click here


silk and lace butterfly tutorial

If you wish to work with more unusual material like lace, the iconic tutorial on Lace and Silk Butterfly can be a good one to explore. Although butterfly wings can be shaped with millinery  tools (and there’s a BONUS on how to do this), the butterfly in the picture can be made without the use of tools. DIY kits for the lace and silk butterfly are also available and sold separately. To learn more about the Lace and Silk Butterfly Tutorial click here.


I hope you will find some of these no tool flower making tutorials for beginners useful. Feel free to share photos of you finished pieces with us ☺

Subscribe to our YouTube Channel for more flower making videos.

shaping fabric flower petals without the use of tools 8

Shaping fabric flower petals without the use of tools

Shaping fabric flower petals without the use of tools: the cold method

shaping fabric flower petals without the use of tools 10I am well aware of the fact that not everyone has got a set of traditional millinery tools to shape flower petals and leaves. Although this does cause certain restrictions with regards to the techniques that can be used and the final results, there are methods that can be successfully applied without the use of tools.

Below I am explaining how you can shape petals using a so called cold shaping method.
To be able to use this method you will require some fabric petals (silk, rayon or thin cotton) and a piece of thin preferably silk fabric about 40cm*40 cm or slightly larger larger( I am using a silk-cotton mixed fabric here).

shaping fabric flower petals without the use of tools 9


First, moisten the cloth either by spraying it with water from a spray bottle or wetting it under the tap. Next, wring the cloth very well so it is only just about moist, almost dry. If the fabric is too wet it can ruin the dyes on your petals. It will not shape them either.
Now, fold the square of fabric diagonally as shown in the picture.


shaping fabric flower petals without the use of tools 8


Then take a petal and fold it in half lengthwise. In the photo I am using pairs of poppy petals, connected with a staple, so I am going to be shaping two petals at a time.This can work for thin fabrics. For the petals made of thicker fabrics it is advisable to shape them one by one for the best results.


shaping fabric flower petals without the use of tools 7


Place the folded petal in between the two layers of diagonally folded moistened cloth as shown in the picture. The folded side of the petal touches the folded side of the cloth (this is important).


shaping fabric flower petals without the use of tools 5


Now it’s high time we shaped the petal. Place the palm of your left hand over the whole of the petal (which is sitting between the layers) and press firmly onto it, especially the very bottom (the base) of the petal. With your right hand pull the right corner of the the cloth away from the left hand that is pressing down the petal.


shaping fabric flower petals without the use of tools 4


Pressing  the petal firmly (particularly at the very base) with your left palm pull the cloth with an effort with your right hand clockwise following the black arrows. Having done a semi-circle with the right hand ease off and let the cloth gradually go.


shaping fabric flower petals without the use of tools 3


The cloth should form a network of very fine wrinkles under your palm and in turn it will wrinkle the petal that has been placed between the layers of the cloth. The finer the lines of the shaping the better the result.


shaping fabric flower petals without the use of tools 1
You might want to practice on a spare petal first to get an idea of how to shape petals using this method. If you are not happy with the result you can return the same petal back into the cloth and shape again. But try not to do this too many times as it will make the petal creased more than shaped.

         This cold method of shaping fabric flower petals without the use of tools works particularly well with such flowers like peonies, irises and poppies. The top edge or the petal can be curled with a pair of heated tweezers or by hand, which does make  this method totally millnery tool free ☺
I hope you find this information useful and applicable to the flowers you make. If you wish to attend a flower making workshop to practice this method, please consider taking part in SILK POPPY HAIRPIECE WORKSHOP (click on the photo below for more information).

Mademoiselle and camellias

fabric camellia tutorial
New tutorial on a FABRIC CAMELLIA BROOCH is out now. For more information please visit the tutorial page
I am currently enjoying reading Chanel,  a book by Danielle Bott devoted to this famous fashion house, its founder, Mademoiselle Chanel and those revolutionary changes she brought into the world of fashion. The book covers five central themes  – the signature suit, the camellia, jewellery, fragrances and make-up.
As you may have guessed I was naturally drawn to the chapter which talks about the camellia, the favourite flower of Coco Chanel. Very much inspired by masculine clothes, she borrowed the flower from a new generation of dandies, who casually pinned a camellia on their jackets. She was enchanted by its perfect, almost geometric roundness. Besides, the camellia possessed the added advantage of not competing with her favourite perfume, as camellias are scentless.
Coco Chanel believed that beauty is nearly always born from radical simplicity. The camellia with its minimalist lines, well-defined curves and almost Art Nouveau  design was destined to appeal to her. The camellia became Coco’s symbol, her icon, one of the recurring elements of her style, using it as an accessory in its natural form as well as interpreting it in unexpected ways in her designs.
An essential element in Mademoiselle’s collections, the camellia is now reworked and reinterpreted by Karl Lagerfeld. The camellia stars in every catwalk show, always present, always surprising. Lagerfeld remodels the camellia in every imaginable way for every season in all sizes and fabrics in every one of his collections. In couture, accessories and fine jewellery, in every material – satin, velvet, leather, canvas, tulle, chiffon and tweed – the camellia is a spirit of fashion. Suffice it to say that every year more than twenty thousand camellias are handcrafted in Lemarie’s flower and feather atellier, one of rue Cambon’s satellite ateliers.
Camellia was one of the first flowers I created in silk. Since then I have experimented with other fabrics  (denim), genuine leather  as well as patterns, sizes, types of accessories and ways of shaping its petals.

leather camellia brooch
Genuine leather camellias
Its almost perfect form is best shown when dense material like genuine leather or denim are used.
denim camellia brooches
Distressed camellia hair clip
However, silk satin with its noble sheen and smooth surface remains a good choice. How about an oversized camellia made into a bridal fascinator?
silk camellia
Oversized camellia fascinator in powder colour
For the above shown camellias I used a pattern which is very similar to the one of Chanel – geometrically round and very regular in shape. The other pattern I use is closer to the camellia flower in its natural form like these bridal camellias:
Golden Metallic camellia

As I am planning my next collection, I have some new fabrics to experiment with, and camellia will be high on my list of flowers to experiment with, as its simple symmetrical from and clean lines appeal to me a lot. Do they to you?