 To back or not to back [ handmade flower petals and leaves with fabric ]? If you have not yet decided on this one, I hope this article will help you make up your mind.
So let’s see why, how and with what we back flower petals and leaves. If you have been following PresentPerfect Creations for a while and had a chance to see our tutorials you might have noticed that I always back foliage with a layer of fabric and quite often (depending on the project though) I do the same with flower petals.
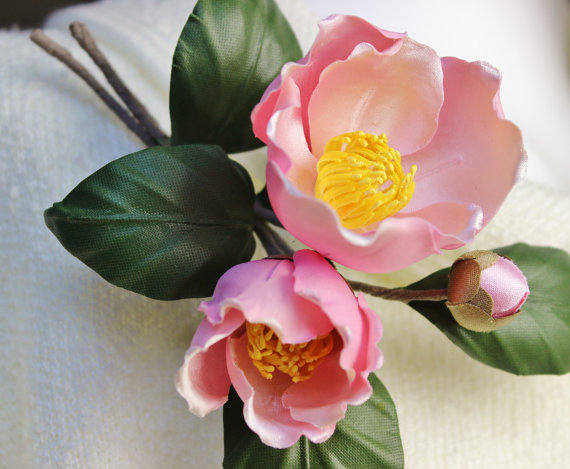
On one hand, flower petals should look thin and delicate, but on the oth er hand since we make wearable flower pieces they need to be durable and robust enough to withstand wear, pressure and possible damage to some extent at least. Reinforcing handmade flower petals and leaves with another layer of fabric really helps achieve certain durability. Have a look at the camellia flowers above. Would you be able to guess that they are actually cardboard hard? They certainly do not look it and that’s the trick: whilst backing petals with another layer of fabric to give them a look of delicacy and fragility that we see in fresh flowers at the same time.
There are different ways of achieving this look and make your stiff durable flowers appear full of life. The technique s will vary from flower to flower but as a rule we use a flower iron and a pair of tweezers to shape parts. My SILK CAMELLIA JAPONICA CORSAGE video tutorial explains the process in detail.
If you happen to attend one of my workshops on an OVERSIZED ROSE HEADPIECE, you have experienced petal backing to full extent. Indeed this oversized rose is made of large satin petals that are all backed with a layer of thin silk. This job requires precision, speed, dexterity and neatness. The good news is, practice makes perfect. If you wish to join me for a workshop on this oversized silk rose please send your enquiry to enquiries@presentperfectcreations.com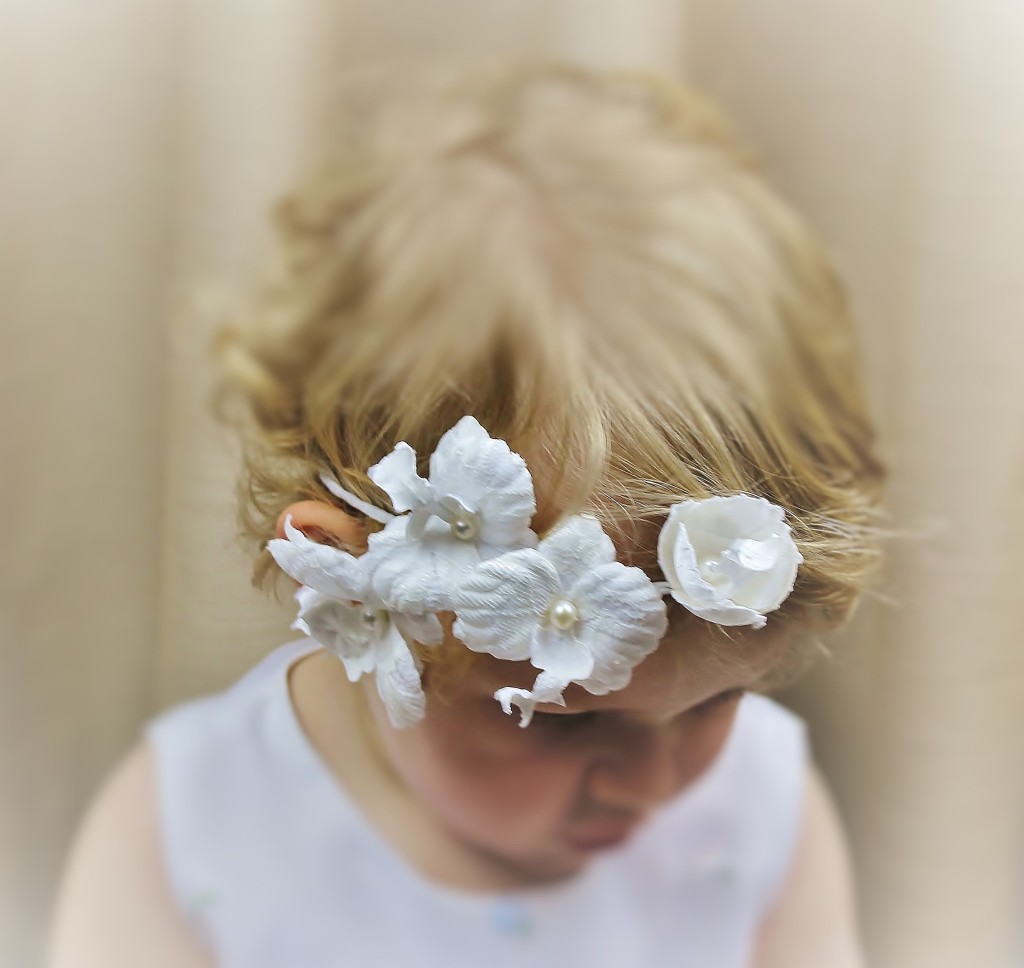
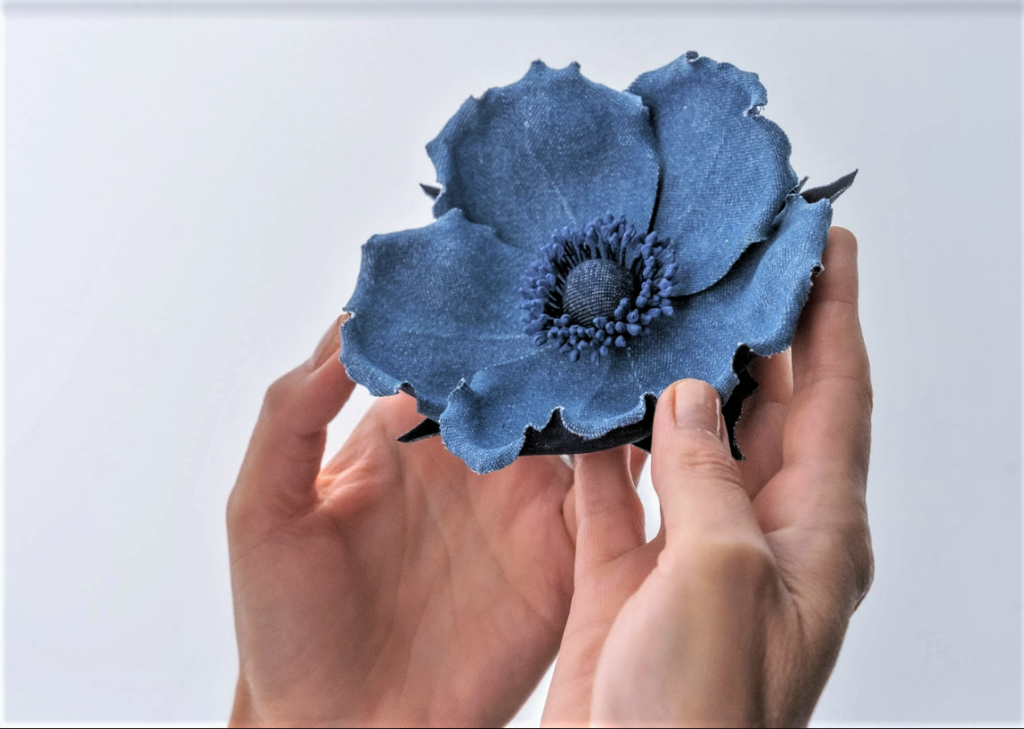
Although not all flower petals get backed, a certain range of materials would benefit from being backed on every occasion. Amongst those are lace, velvet, denimetc.
LACE ORCHID HAIR CIRCLET video tutorial teaches you how to work with lace and turn it into delicate ethereal flowers that are also robust. White lace flowers are perfect for bridal pieces but if you take coloured lace or dye white lace yourself you can make evening wear floral pieces and much more.
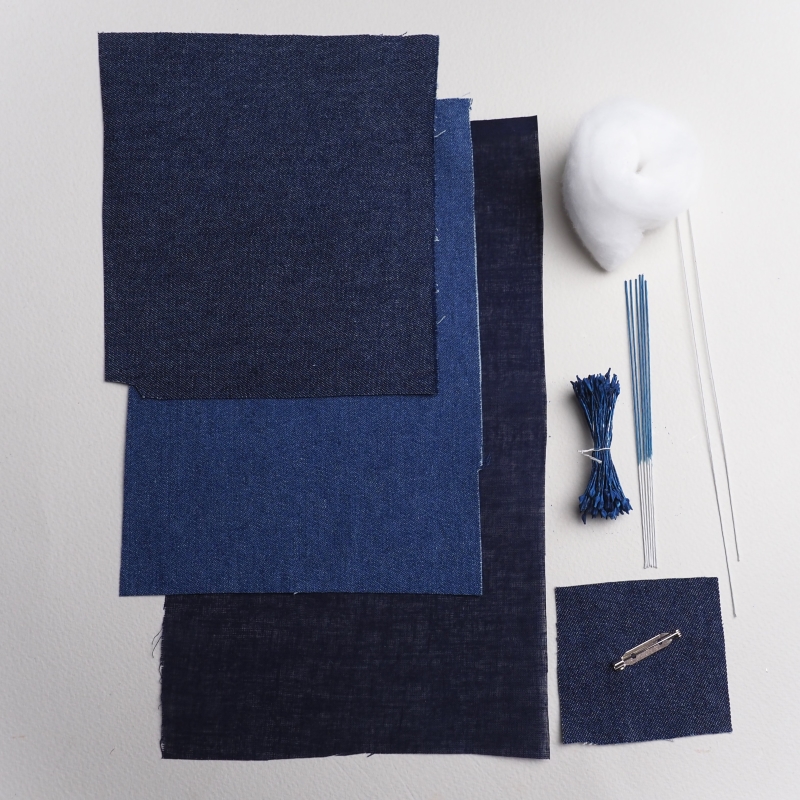
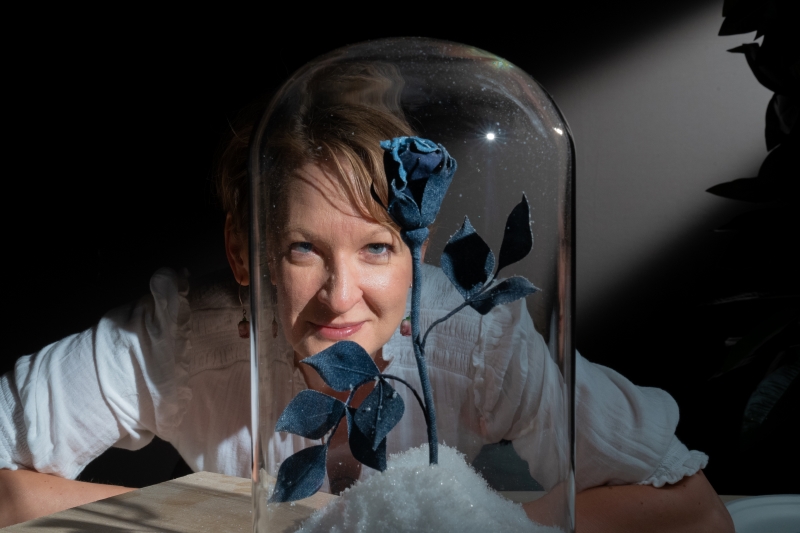
Another video course on a DENIM ROSE BUD shows how to work with denim.
So, 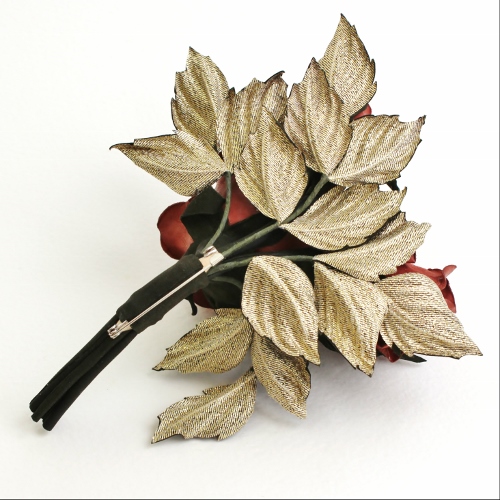 what fabric(s) to choose for backing?
The choice is more than you might think. For petals some thin fabrics like pongee or organza are used in most cases. But if your petals are made of heavier fabric (velvet, denim or similar), you can go for thin or thick satins, or decorative fabrics with metallic threads.
When backing leaves you can choose from an array of different fabrics ranging from very thin (think pongee, organza) to satins to decorative metallic fabrics to velvet should you 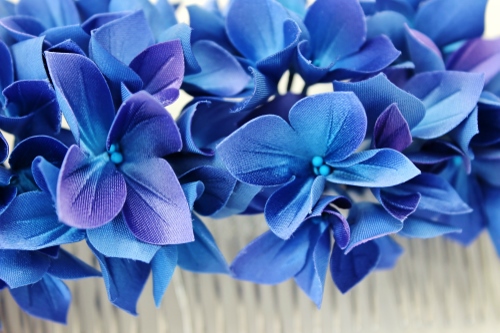 wish. There is no hard and fast rule about which fabric to use. Depending on your main fabric try to choose a backing fabric that will complement your design and give it a beautiful finish.
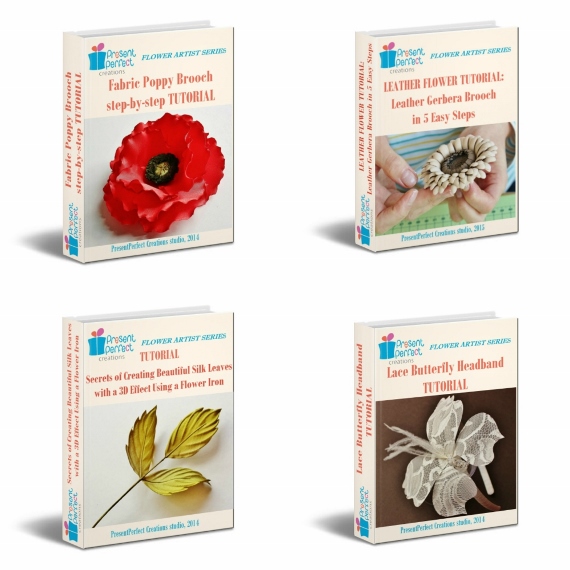
I personally love the durability and definition of backed flower parts be it petals, leaves or butterfly wings, that is why I use this method on a regular basis in my works. To learn more about how you can create handmade flower petals and leaves by backing them with a layer of fabric please have a look at some of the photo tutorials by PresentPerfect Creations studio below:
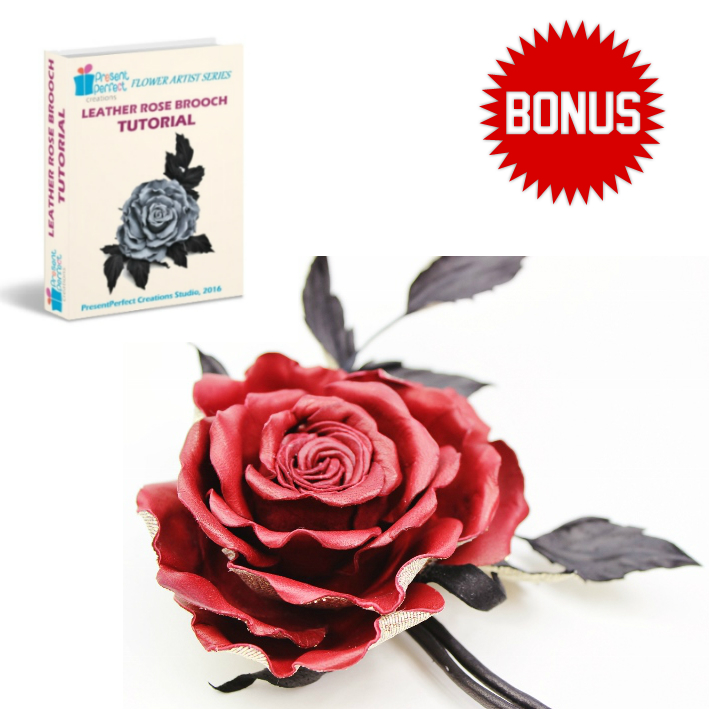
A detailed BONUS photo tutorial on Leather Rose Brooch. Yes, you got it right, you can back leather petals and leaves with fabric too! And this bonus tutorial that comes as a freebie together with LEATHER ROSE BROOCH photo tutorial will teach you exactly how you can do that.

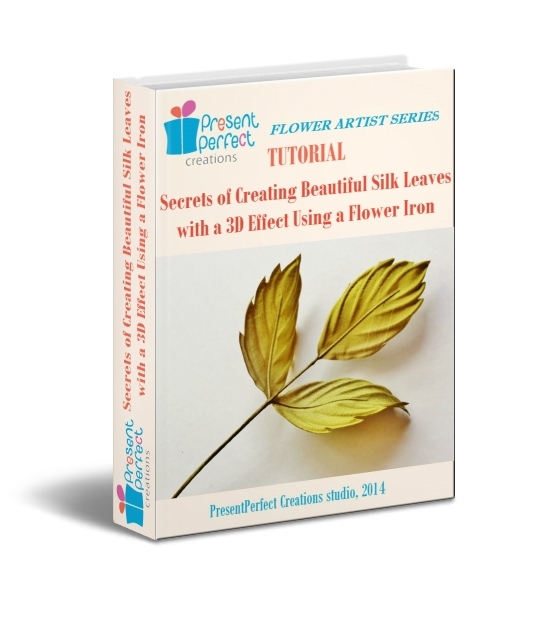
A step-by-step photo tutorial on how to create MILLINERY LEAVES that are just right for your project. Still looking for suitable leaves online and in shops? Look no further. A flower iron and this tutorial is everything you need to create any fabric leaves your project calls for.
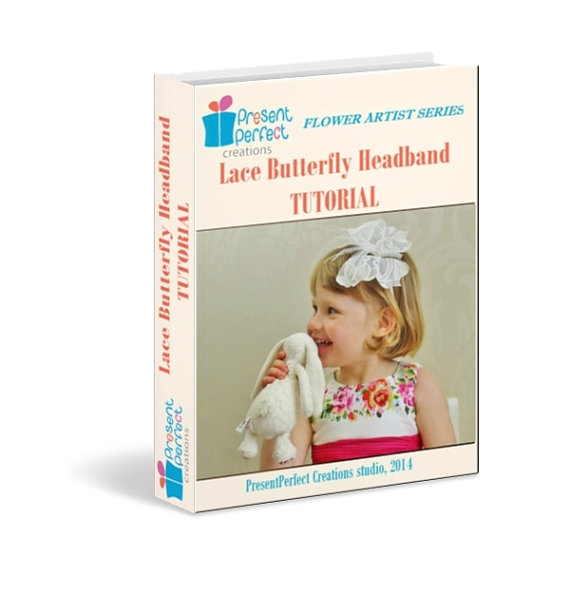
A step-by-step photo tutorial on how to create our SIGNATURE SILK AND LACE BUTTERFLY ON A HEADBAND. As a bonus you will also get FREE tutorial on how to shape a velvet butterfly with a flower iron (details inside the main tutorial once you’ve got it)
Should you wish to try and use some decorative fabric with metallic threads in your work (think Christmas ☺) please check this beautiful semitransparent rayon fabric with golden metallic thread. It will look great at the back of leaves as well as petals. The fabric comes prestiffened and is ready to be used in flower making.

`[tiny_coffee]`

 So if the language was an obstacle on your way to learning textile flowers before, it is not an issue any more 🙂 You can choose your language and enjoy the creative process.
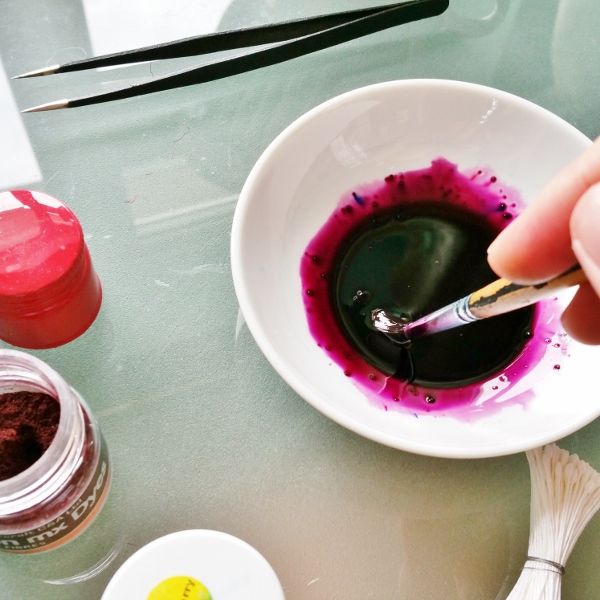
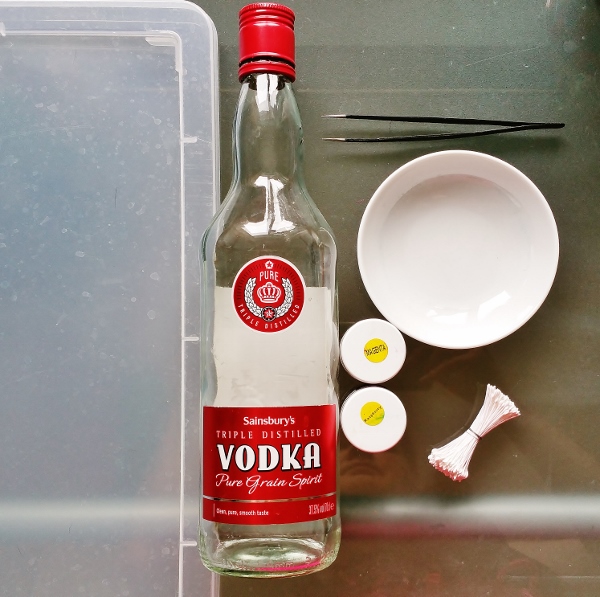 Colouring stamens for flowers made easy!
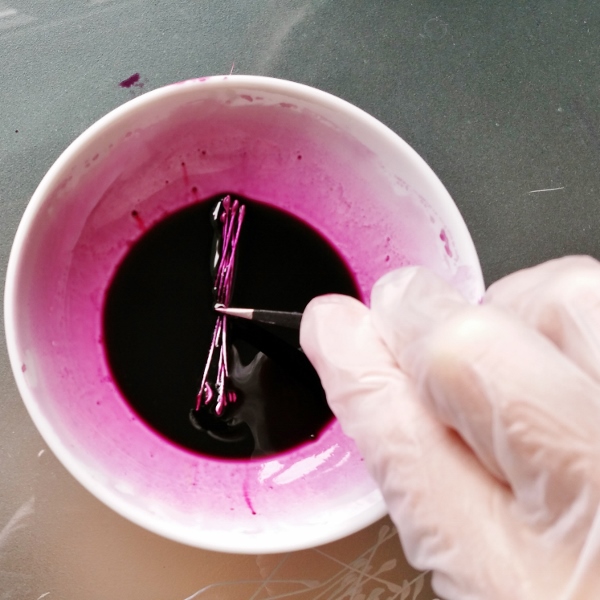
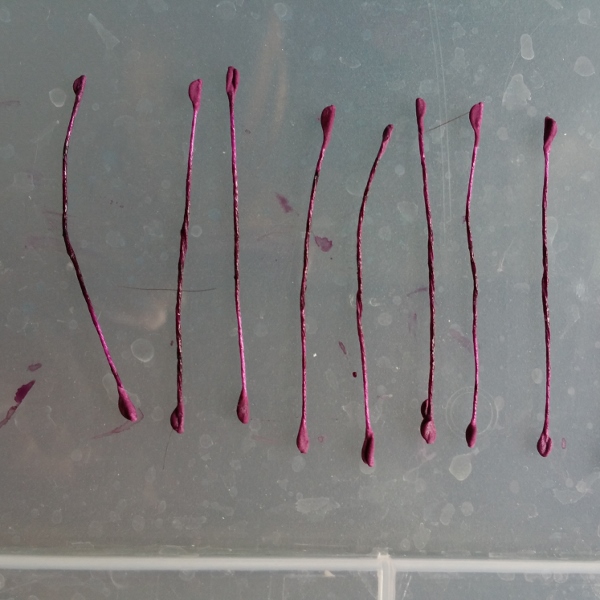 Having dyed a small bunch of stamens put them onto a prepared non porous surface like glass or plastic and leave to dry. It is important that the stamens are separated (see the photo). Otherwise they will stick together as they are drying.
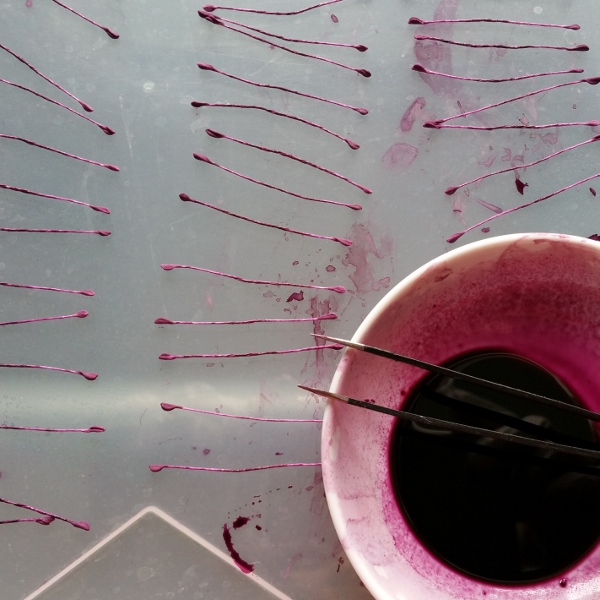 dry on the non porous surface. Please do not use paper as the wet stamens stick to it.