wild leather violets TUTORIAL

Wild Leather Violets Tutorial

Free Wild Leather Violets Tutorial for beginners+

This is a fun free tutorial on stylised wild violet flowers made of genuine leather without the use of any specialist tools. The wild leather violet tutorial is suitable for all levels including complete beginners.

wild leather violets tutorial supplies
Leather Violets Tutorial

Other no tool beginner friendly flower making tutorials can be found here.

Here is a list of tools and supplies we will need for making our leather violets:

💜  thin genuine leather/ suede (lamb, goat, pig) in suitable colours

💜  contrasting leather for a butterfly (optional)

💜  lightweight silk fabric for stems (preferably stiffened)

💜  stamens

💜  wires (gauges #28 or #26)

💜  scissors

💜  wire cutters

💜  awl

💜  pliers

💜  thick tacky PVA glue for assembly + glue for stiffening

cotton cloth

💜  brooch pin (optional)

Use the button below to download your templates for this tutorial. In order to download them, you will be asked to subscribe to my Flower Makers’ newsletter. It is free and you can unsubscribe any time if you wish to do so.

wild leather violets tutorial
1. Using the template provided trace as many violet flowers as you need for your project. Here I am using 15-20 flowers. On darker coloured leathers it is helpful to use an acrylic pen in white or silver.

2. Once you have traced the flowers, cut the leather roughly to separate the flowers first. Using the dotted lines in the template as a guide make deeper cuts between the petals as shown in the photo. This will help with shaping later.

wild leather violets tutorial
3. Next, cut all the flowers our neatly, making sure you have cut off all the pen markings.

4. Prepare the stiffening solution. If you have never done it, read this blog post on how to do it.  Place all the flowers into the stiffening solution and let them saturate well.

wild leather violets tutorial
5. Once the leather flowers are completely soaked through, take them out of the solution and squeeze extra solution out so they are not dripping (excuse my pink fingers, the purple suede I am using has leaked some pink dye into the stiffening solution).

6. The flowers are going to be shaped by hand. Start shaping by folding each flower in half lengthwise. You will have 2 pairs of petals and one larger petal folded in half. Next, place one pair of petals on top of the other (see above).

wild leather violets tutorial
7. Place the large folded petal on top of all other petals to form a small neat pile. Next, fold the pile in half. It will be fiddly as the petals are small. Try to do your best here.

8. Place the folded pile of petals into a cotton cloth and twist the flower carefully together with the cloth as shown. This way the flower will remember shaping better. Shape all the prepared flowers in this way.


9. Leave the shaped violet flowers to semi dry for 1-2 hours.

10. Meanwhile prepare the lightweight silk for wrapping stems. I am using this thin rayon fabric which I have dyed green. If you have a thin green ribbon like this, it can work very well. I prefer my fabrics to be stiffened. Watch this video on how to stiffen your own fabrics.

wild leather violets tutorial
11. After 1-2 hours of drying carefully unravel each flower making sure you preserve the hand shaping you have meticulously created.

12. Open up all the flowers and leave to dry completely as shown above.

wild leather violets tutorial
13. For the next step prepare the stamens, the green fabric and the wires. I have dyed the top parts of mine purple so they are not seen inside the flowers. My wires are about 20 cm long for this design.

14. This step is optional. To secure a wire inside each flower I like making a small loop at the top of the wire (see above). Use an awl to wrap the wire around and make a neat loop.

wild leather violets tutorial
15.  To add a stamen to the wire and neatly cover the stem of each flower with silk, cut about 1 cm wire ribbon and fold in about 1/3 of its width (see above). By folding part of the ribbon like this you are stopping the edge from fraying, providing a neat finish to your stems.

16. Place a stamen next to the loop, add a little glue and start tightly wrapping them together wit the prepared folded in ribbon of thin silk at an angle as shown above.

wild leather violets tutorial
17. Stems are part of the design in my brooch so it is important to make them look nicely finished. Prepare the stems for all your violets in this way.

18. To wire the violet flowers make holes in the centre of each flower using the awl. Then thread a stem through the hole and add a dot of thick PVA glue just under the stamen (see the photo).


19. Carefully pull the stem down to make sure the stamen (and the loop) are glued deep inside the flower. If there is any excess glue remove it with the tip of your awl.

20. You can add a leather butterfly on one of the flowers if you wish. I am explaining in detail how to make small leather butterflies like this one in the Leather Hydrangea flower Tutorial.


21. Wire all the prepared violets and give the glue the time to set.

22. You can make a number of designs with these flowers, on their own or adding them to larger leather blooms you already know how to make. I have arranged my violets into an oblong brooch by twisting their stems together.


23. To make the piece wearable remember to add a brooch pin.

24. The Wild Leather Violet brooch is ready to wear 😊

These dainty flowers come in all shades of purple/ violet as well as pink and white. Experiment with the colour, size and finish and create pieces that are uniquely yours 💜

wild leather violets TUTORIAL


You can subscribe to my Youtube channel here.

silk rose choker necklace

Flower chokers

magenta flower chokers 
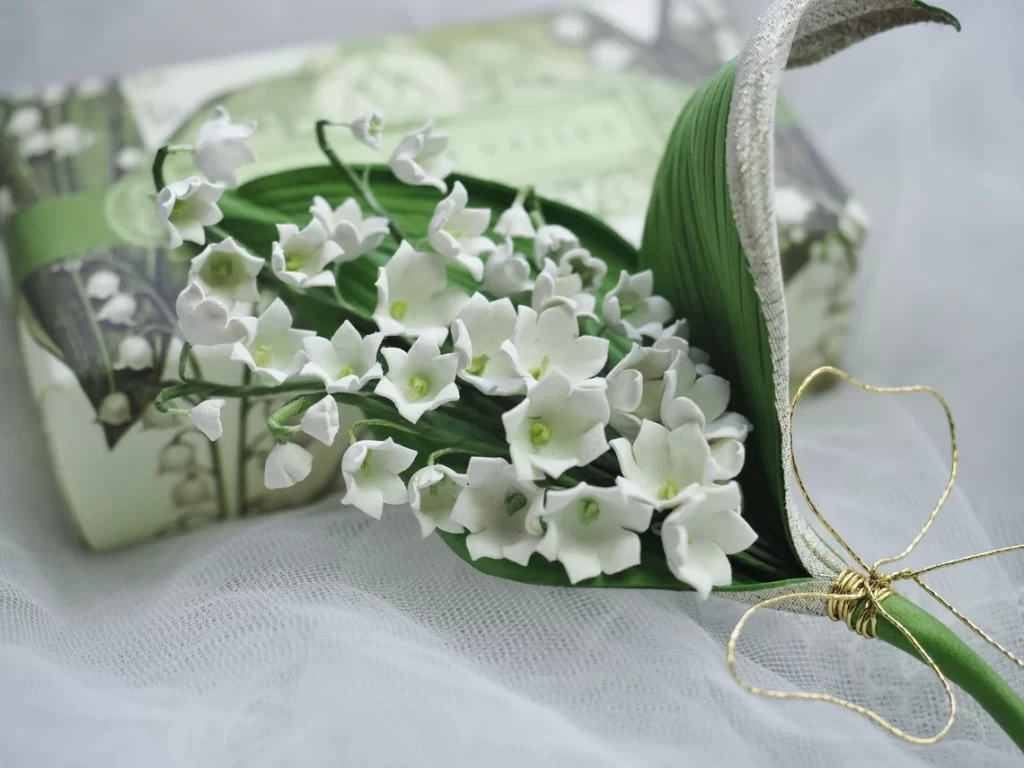
Delicate silk flowers seem to be a perfect fit for flower chokers, these romantic close-fitting necklaces that have remained popular over the years.

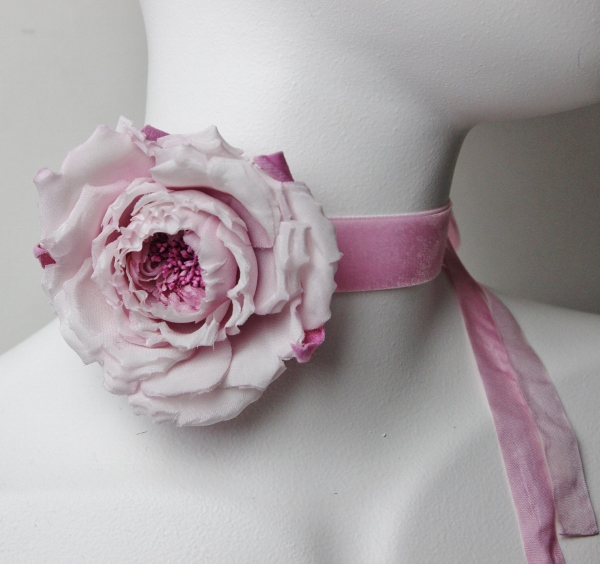
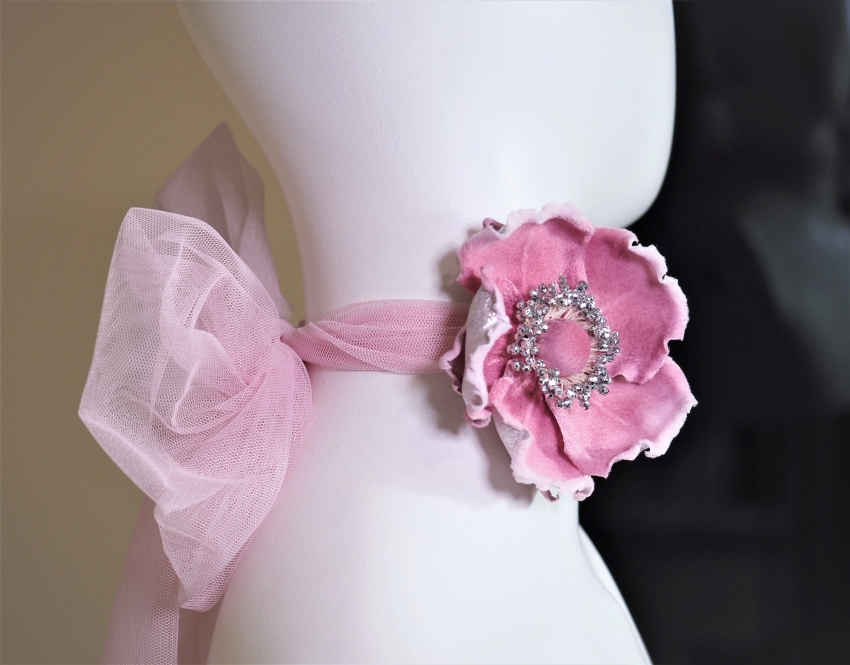
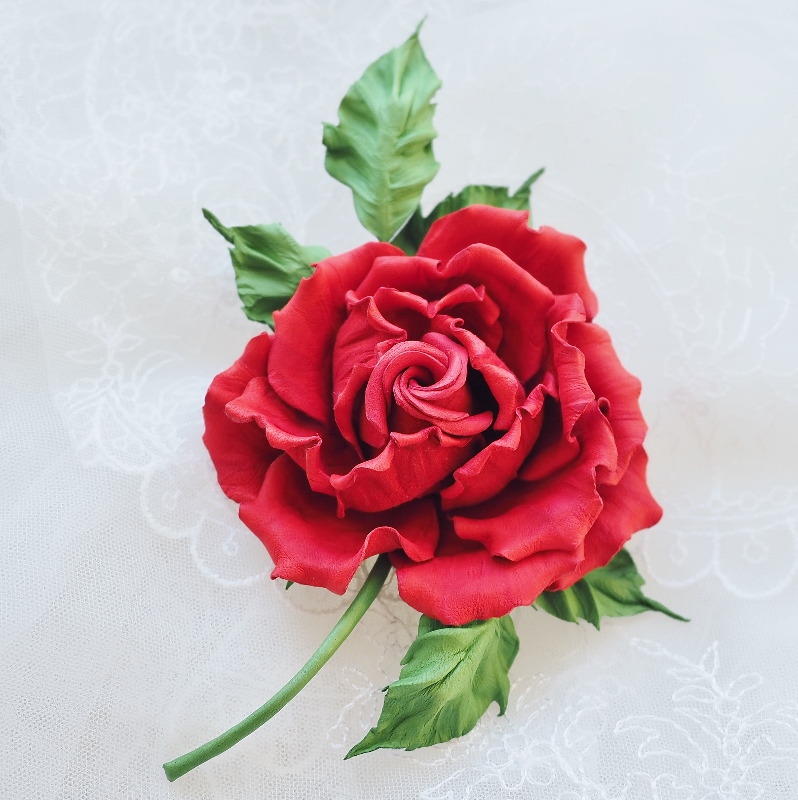
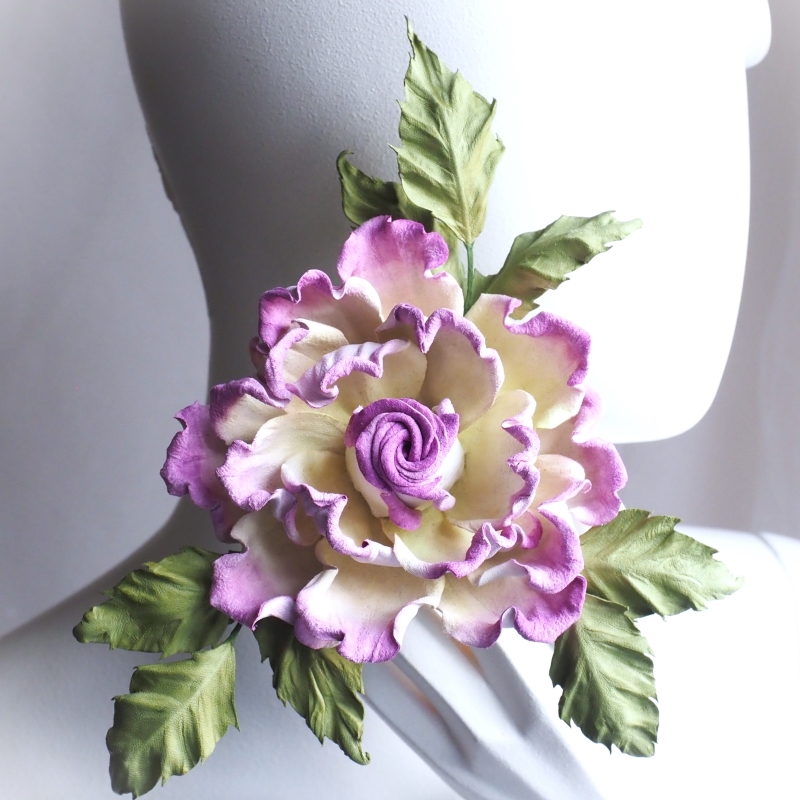
Perfect for bridal and evening wear, especially with strapless open neckline dresses flower chokers can accentuate the slender neck of the wearer as well as add a soft floral touch to the overall look. A medium sized rose works well here.

To shop flower chokers that are in stock right now click here 

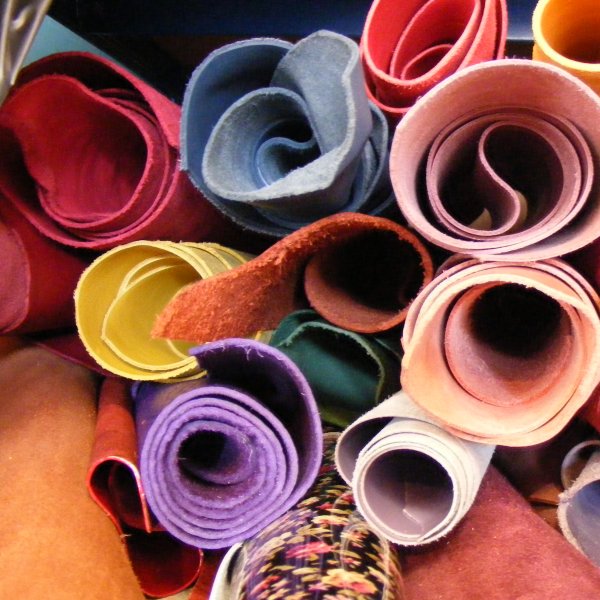
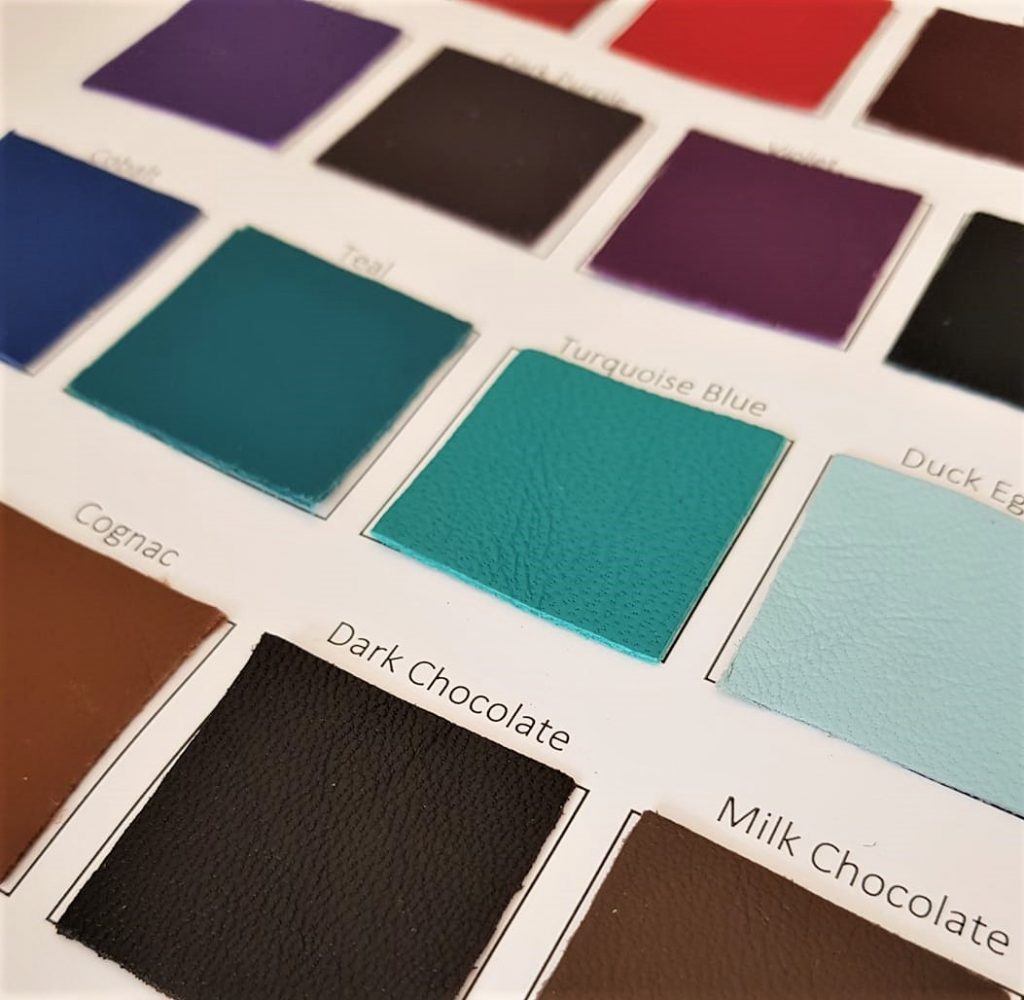
As we dye our silk flowers from scratch the flower choker can be easily matched in colour with the dress.

For bridal flower chokers opt for white, ivory or cream fabrics and include lightweight golden or silver fabrics as a possible addition.leather poppy flower choker

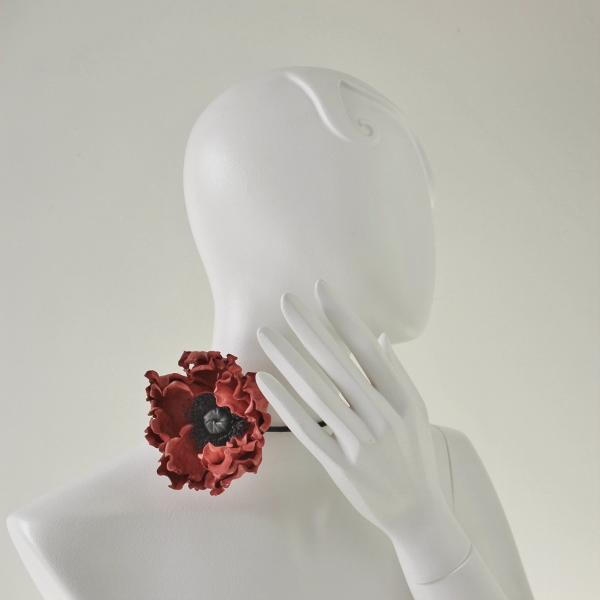
There are a number of metallic findings you can purchase for making chokers from ribbons. In theSilk Marie Antoinette tutorialI am demonstrating how to turn your handmade rose into a wearable one-size-fits-all choker simply using velvet and silk ribbons.

flower chokers side

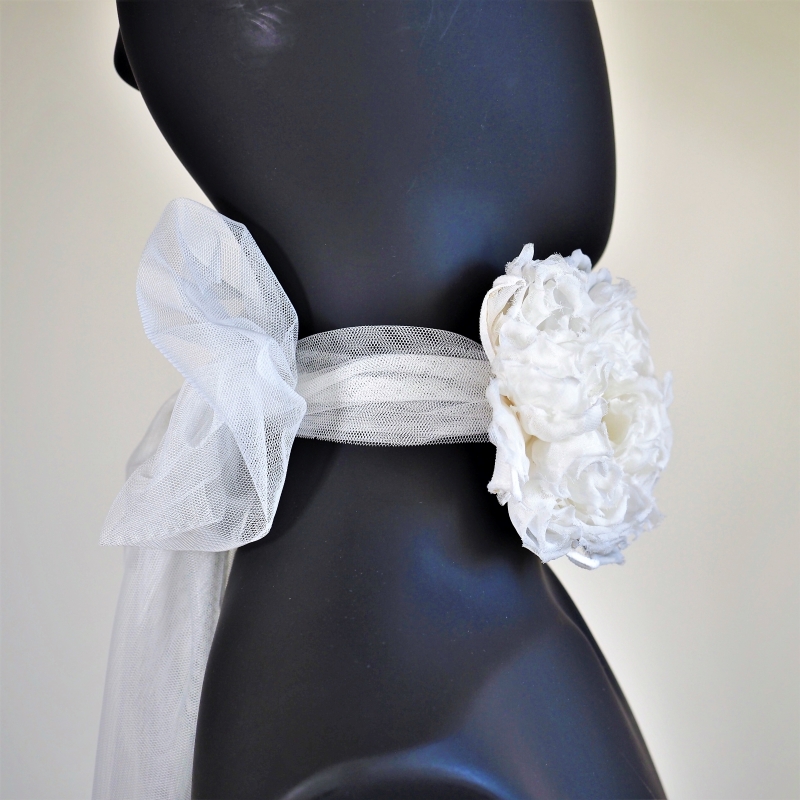
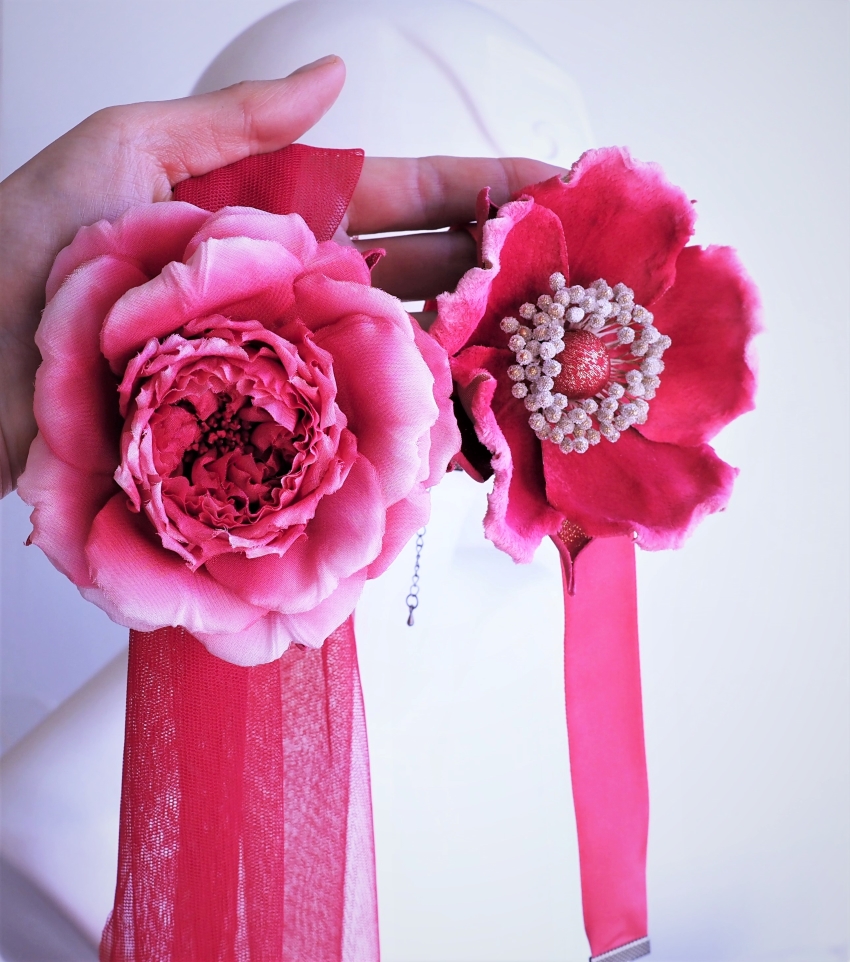
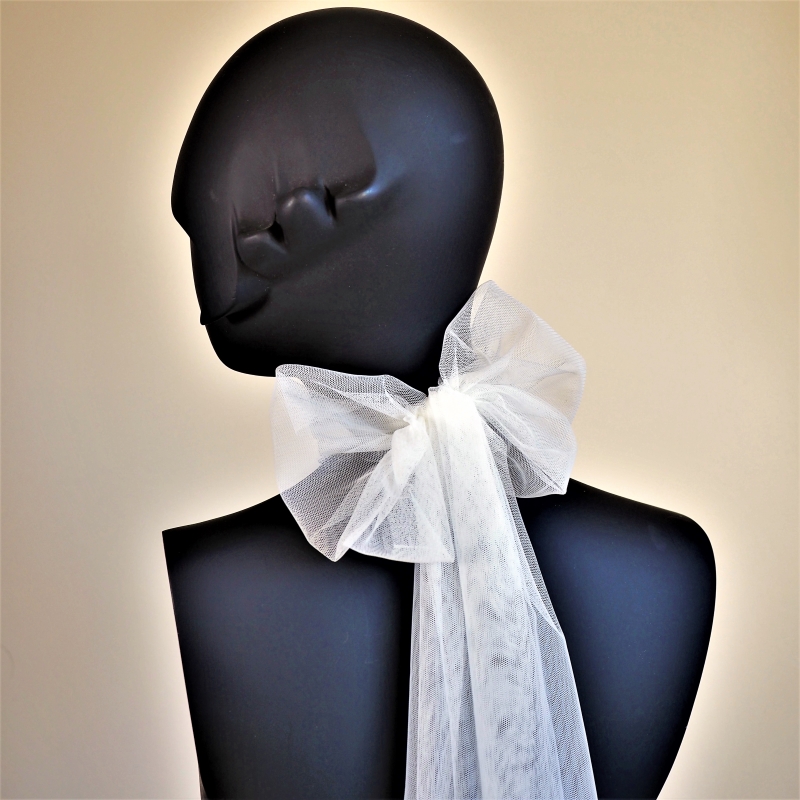
Another option to finish your silk rose is to use some soft tulle fabric (can be pur
chased in a number of colours) and tie it at the back into a large yet lightweight bow as shown in the photo on the right.
The fuller rose featured in this choker can be made during one of my
online video workshops I offer to my students.

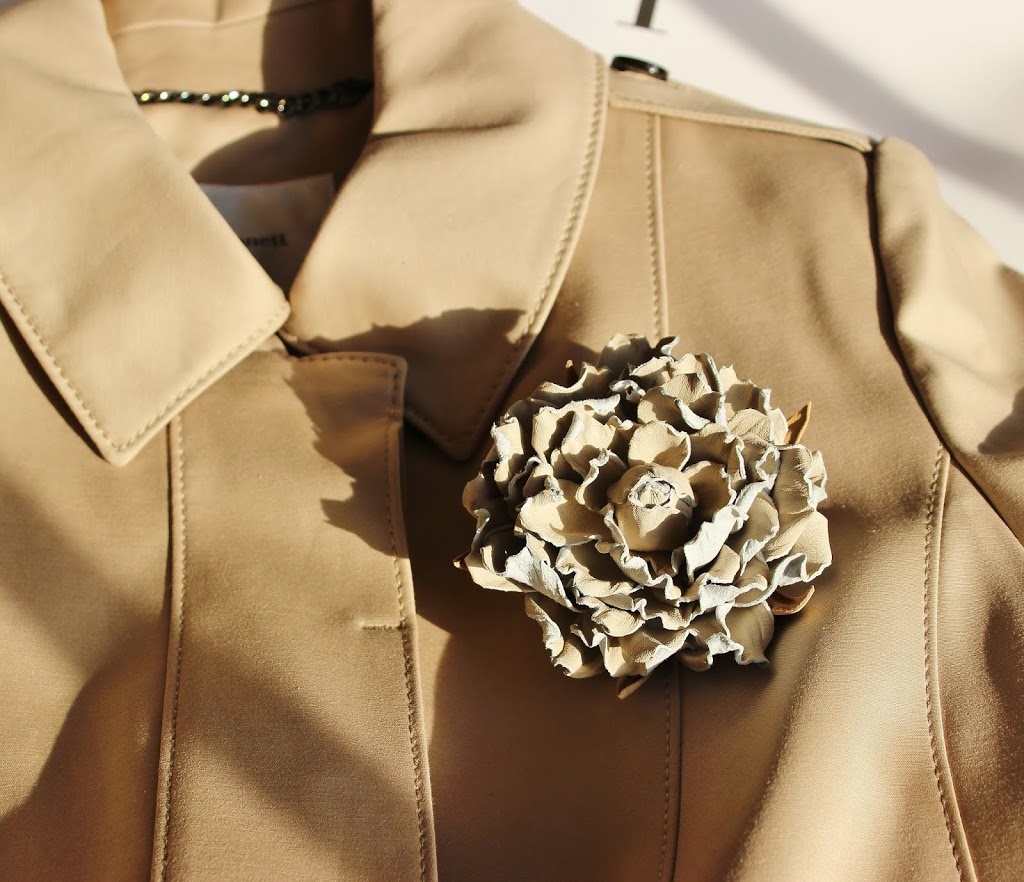
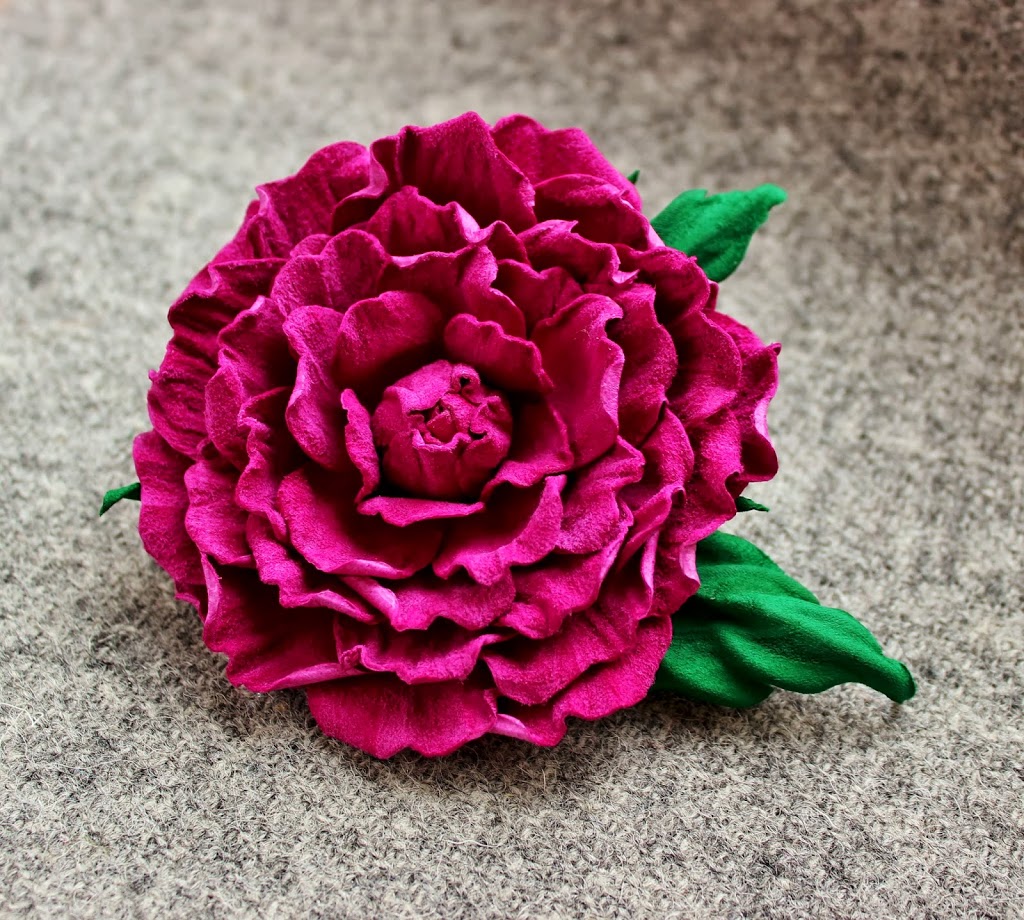
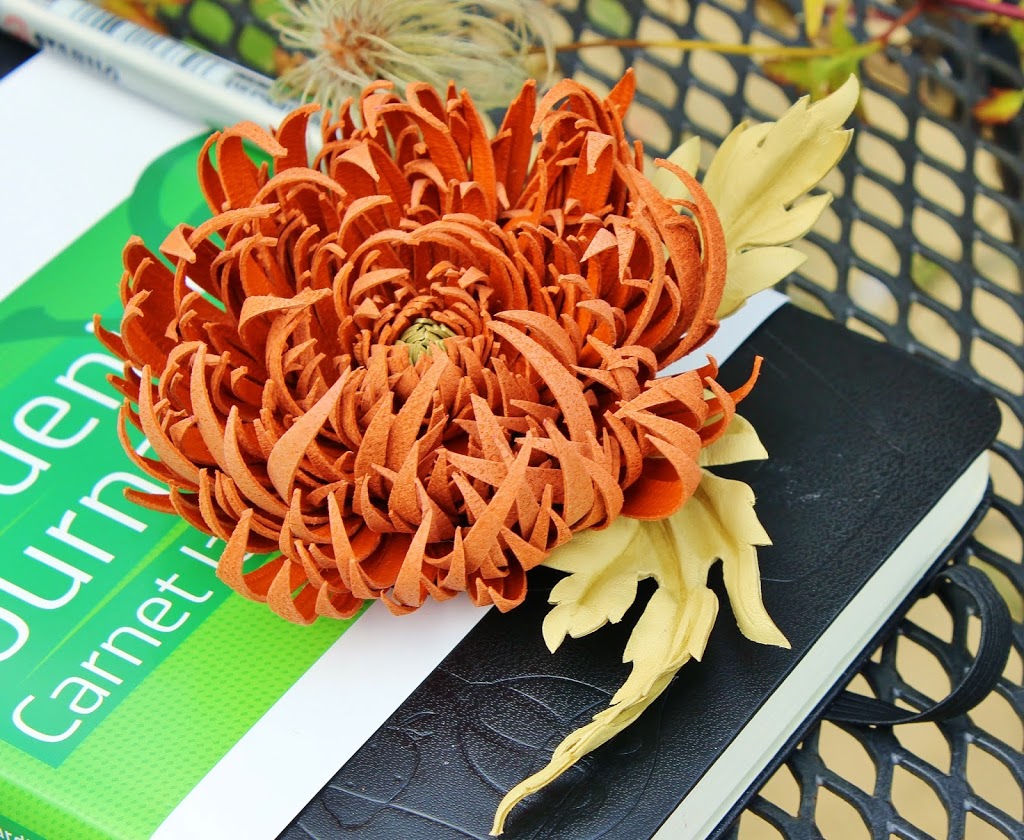
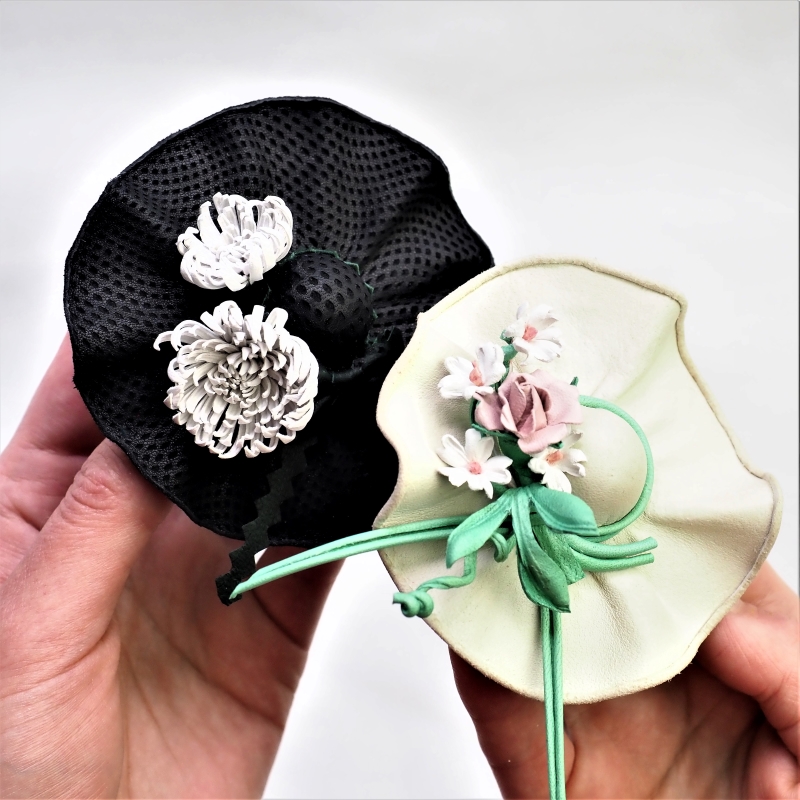
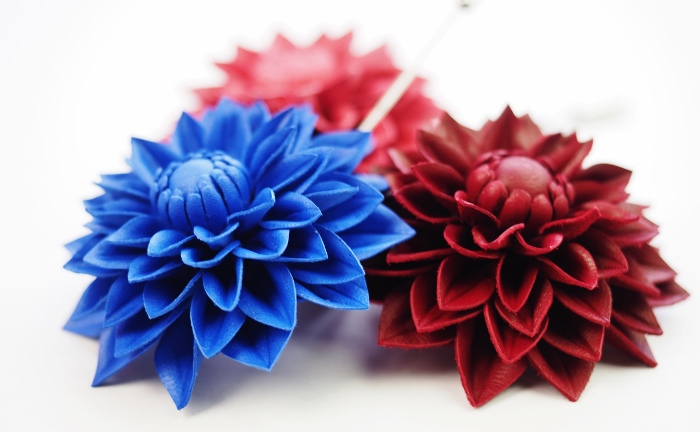
Some leather flowers can also be turned into choker style necklaces.

red organza poppy choker front

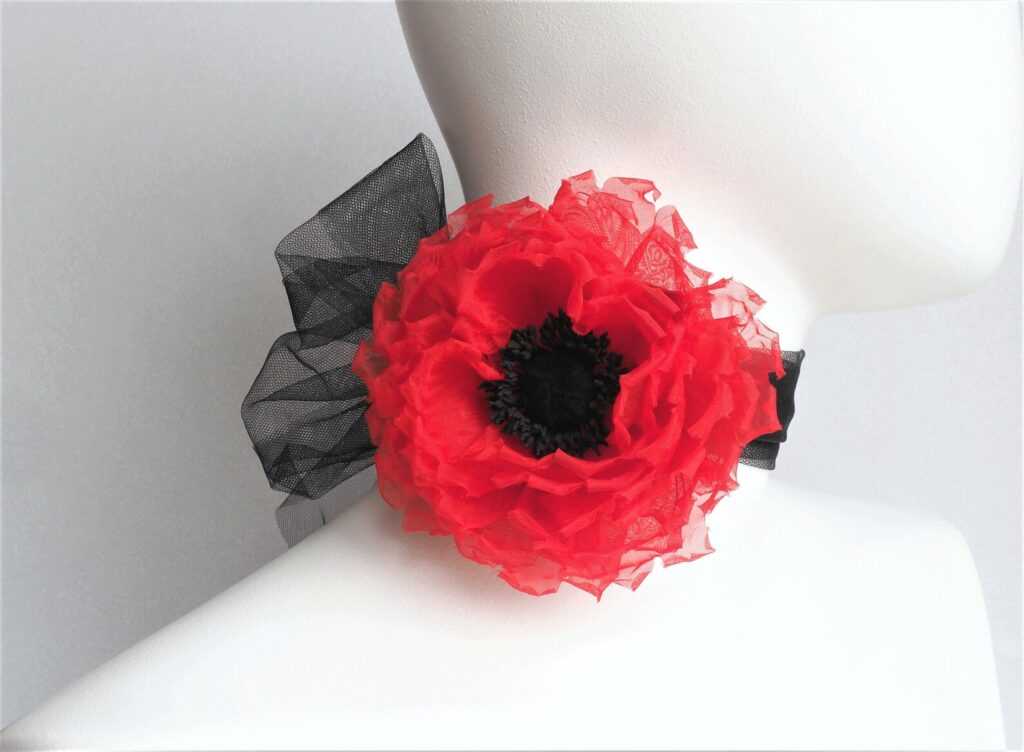
It is better to choose light soft flowers like this ever so popular leather poppy (photo on the left).


The poppy features 4 pairs of petals and it the right flower to be used here. Some leather roses can als
o be used instead (for example the Wild Leather Rose).
In the Leather Poppy Tutorial I am demonstrating how to turn the poppy stem into a choker style necklace, which means you will not need any special findings to turn your flower into a wearable piece.

 NEW! Now you can purchase an organza poppy choker as well.

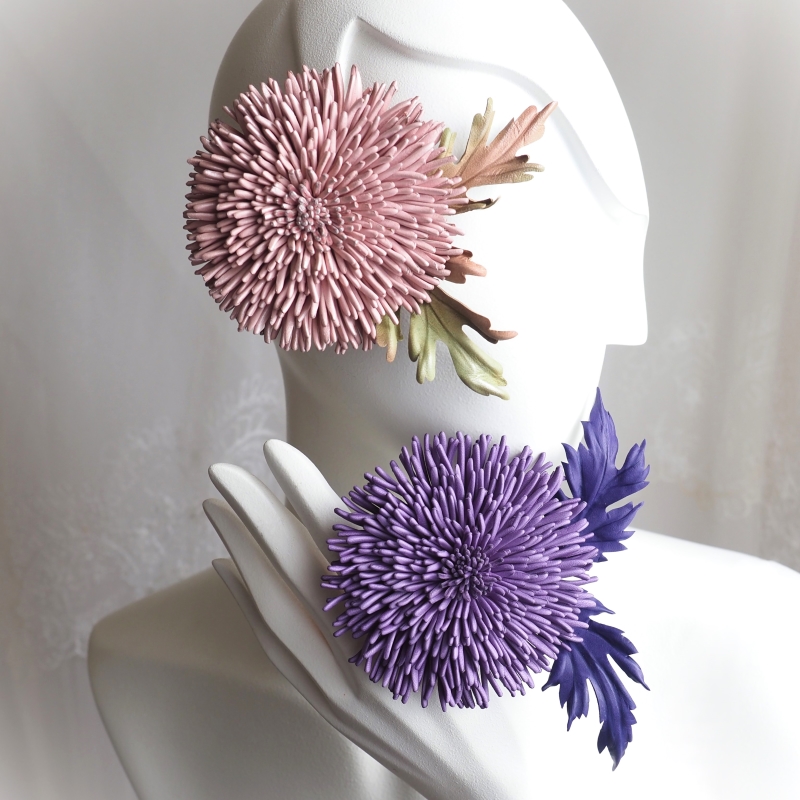
 Very romantic, the leather poppy can look rather dramatic and add a bright colour accent to an outfit.
Depending on the style, occasion and outfit there are different options for possible flower chokers  you can
 consider.
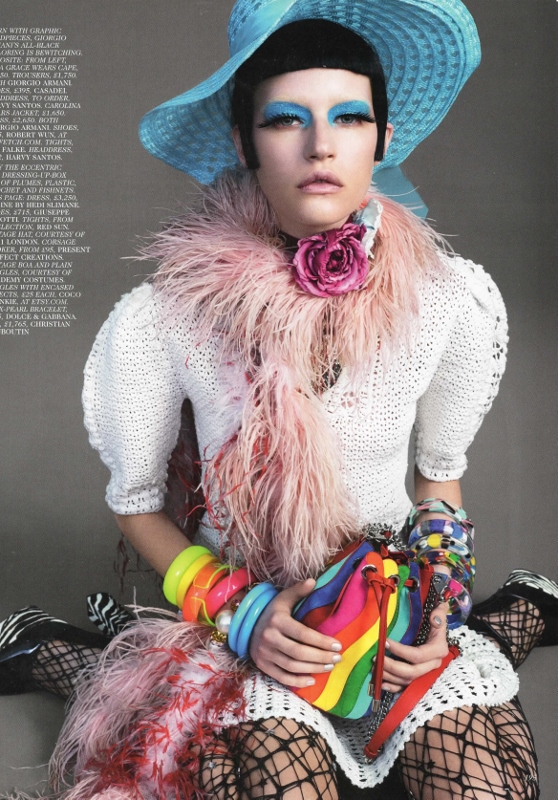
A couple of my silk rose chokers made it to the British Vogue acouple of years ago. If you are not offering any flower choker pieces as part of your collection it is high time you did.
I wonder which one you prefer more, silk or leather?
flower chokers back
leather for making flowers

How I choose leather for making flowers

leather hides
As I’ve always said cold months is that period of the year when leather flowers outshine fabric ones. Amongst other reasons I would mention at least the following two:

❀ leather is a more durable material and flowers made of leather are more weather-resistant than silk ones

❀ leather and suede flowers nicely complement winter wardrobe pieces made of thick warm fabrics and wool, accentuate hats, bags and boots.

At the moment I am working on a new tutorial which will be released later this week. As the tutorial is on a leather flower, I thought I’d share some useful tips on how to choose leather for making flowers the way I do it for mine.

In order to create leather blooms (the way I show in my tutorials) we use only genuine leather or suede. No synthetic substitutes can withstand the heat of a flower iron when flowers are being shaped. Moreover, faux leather does not possess the level of flexibility and suppleness needed for making our gorgeous blooms.

first leather rose video course
MY FIRST LEATHER ROSE VIDEO COURSE

It is best to work with good quality materials. This way you will enjoy the process of creation and the final piece will show class. However, good quality does not have to cost the earth.

Leather comes in grades. There are several grades of leather, sometimes marked as Grade 1 or Grade A etc.  the smaller the number the higher the quality (Grade A is higher quality than Grade C). Because petals and leaves are relatively small compared to, say, garment parts, we  do not necessarily have to use leather skins of higher grades. Lower grades as as well as smaller pieces of leather will work just fine.

For leather or suede flowers only thin and soft skins are recommended. The best thickness is 0.5-0.8 mm (1-2 oz in weight), but you can use skins up to 1 mm thick (for certain flowers). Ideally look for lambskins and goat skins  that are suitable foe clothing or glove making (gloving leather).how to choose leather

Sometimes I use pig suede. Although it is a bit on a thicker side and can be uneven, the wide range of rich colours it comes in makes it difficult to resist.

Leather and suede have different finishes. This variety of finishes is used to enhance the natural beauty of leather. The most common ones are aniline, pigmented, patent, metallic, oily, waxy, suede and nubuck. Leathers with different finishes will behave differently when stiffened and shaped to be turned into a flower piece.

Unlike silk leather is much less predictable. That is why it is virtually impossible to recreate a leather flower again. It will be different and for me that is the advantage of working with leather. Creating leather flowers is always a journey into the unknown. No need to worry, the outcome is always uniquely beautiful.

I hope this information will help you choose the right leather for your flowers and enjoy the process of creation even more.

PHOTO TUTORIALS on LEATHER FLOWERS THAT ARE AVAILABLE FOR PURCHASE


tutorial banner


We also offer individual workshops on leather flowers, so if you are interested please click through for more information.


Indian Summer has arrived. New line of leather flowers

It is official, autumn is here. And although the days are still rather warm and even sunny the mornings are chilly and filled with dewy cobwebs.
In colder months I find that silks and other delicate fabrics tend to lose their appeal and give way to more seasonally appropriate fellow material, leather. Lately, I have been working on my new line which I dubbed Indian Summer. Those of you who live in the Southern Hemisphere may not have experienced this natural phenomenon. Indian summer is a bit of summer in autumn, a period of lovely warm and dry weather that occurs between late September and mid November in the Northern Hemisphere .
So what I was trying to achieve here is a line of brightly coloured accessories featuring autumnal blooms in rich and seasonal hues.
I started with chrysanthemums and have created this rusty orange open chrysanthemum corsage made of thin leather.

Click here for more detail on chrysanthemum corsage

The next piece was a red and brown leather gerbera.

Red leather gerbera brooch

Of course I could not possibly forget about roses, so I created two: an open one made of velvety suede in cerise colour

Cerise suede rose brooch. SOLD OUT

 and an English multipetal rose in deep aubergine hue. The latter one was experimental and I am pleased with the result. When I get hold of more very thin gloving leather I will make more of it in other colours.

Click here to read more about the purple rose brooch

One of the most unusual pieces from my Indian Summer line was this one called Summer Reminiscence. Not exactly a wearable hat, but a leather hat brooch, that’s what it is.
To give you a sense of scale I’ll just mention that the diameter of the pink rose is about 1 cm.
The hat and the trimmings are made using genuine leather and suede.

Leather hat brooch

The autumn has just started and I am planning to add more pieces to this bright line of accessories. I must admit, not all the experiments were equally successful, some like cyclamens and anemones need more work done to them which will keep me entertained during shortening autumnal days.
As always I would love to hear your feedback on my work, do it by either commenting below or e-mailing me at svetlana.faulkner@gmail.com

stiffening leather tutorial

How I tame leather. Mini-tutorial on stiffening leather skins

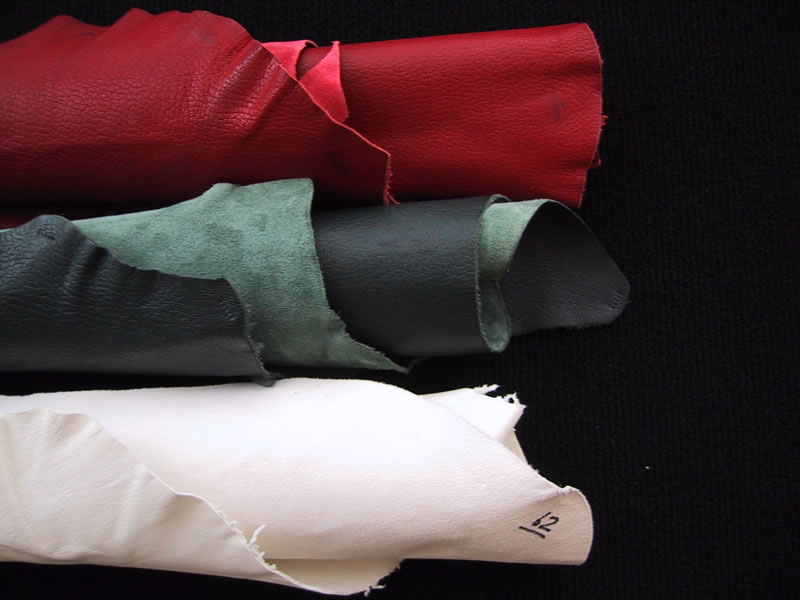
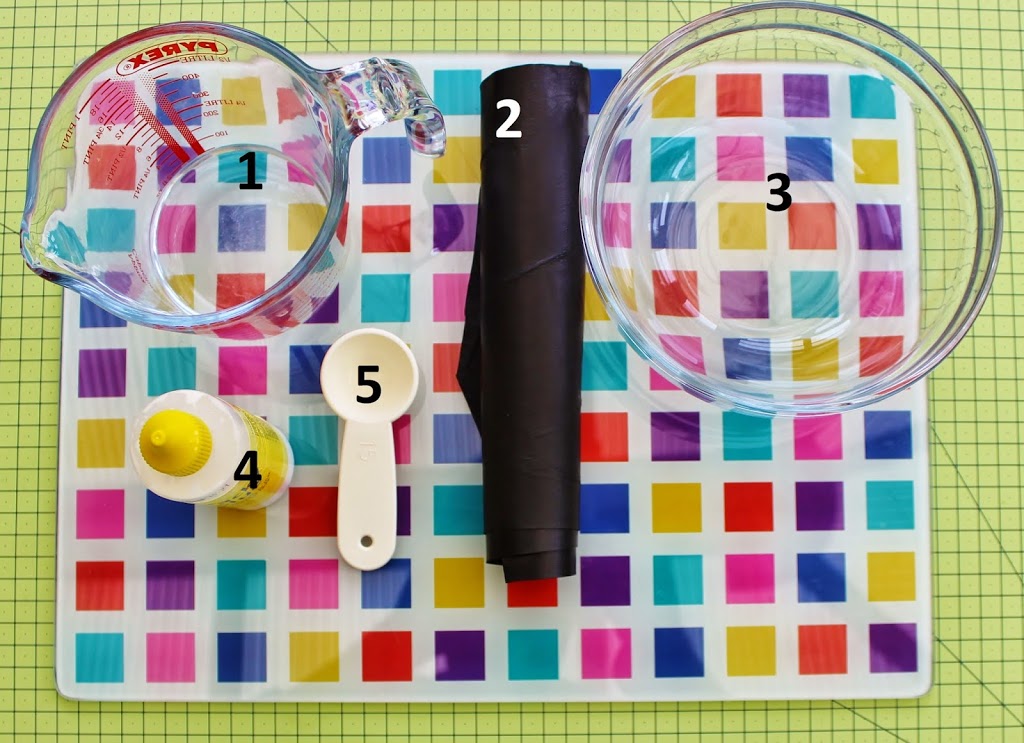
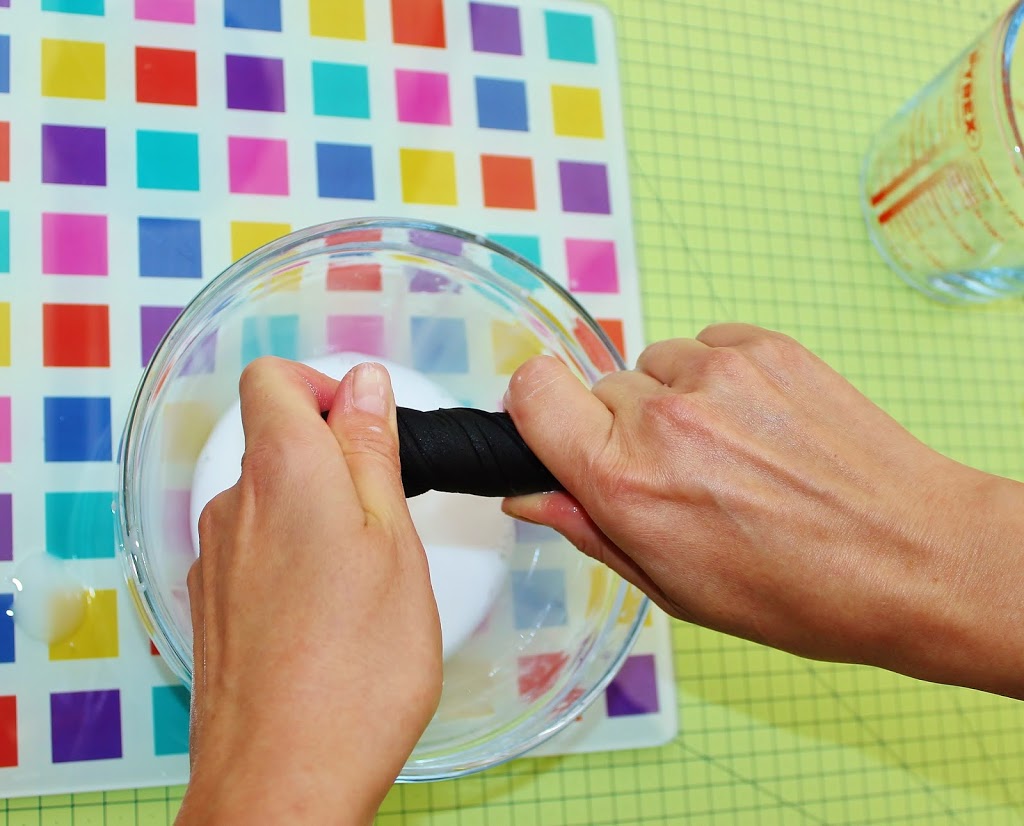
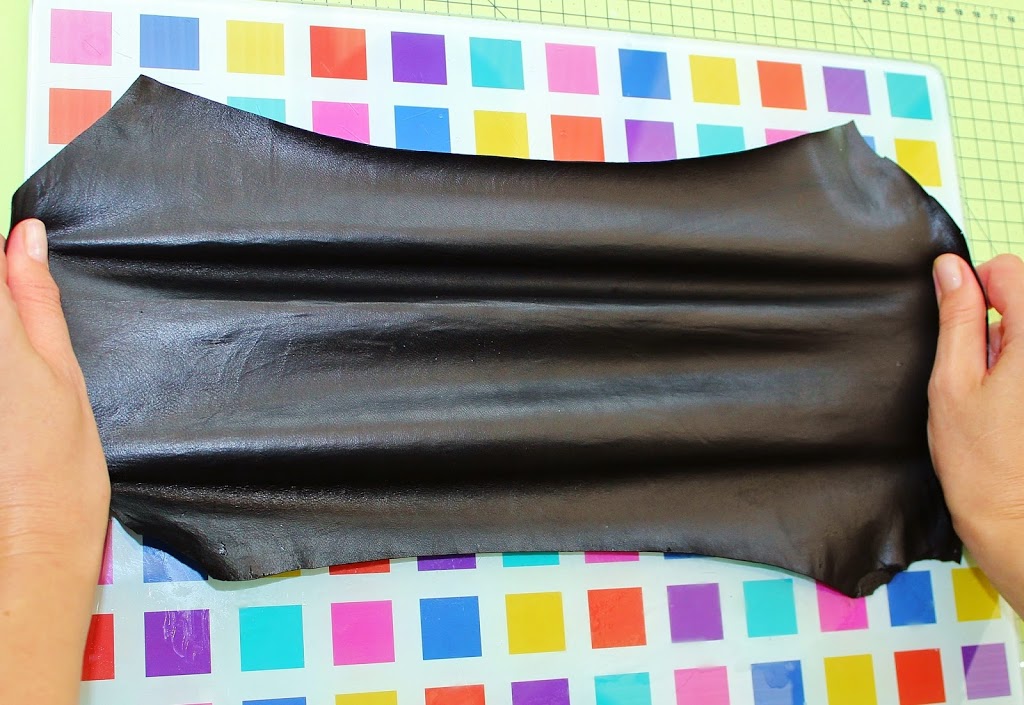
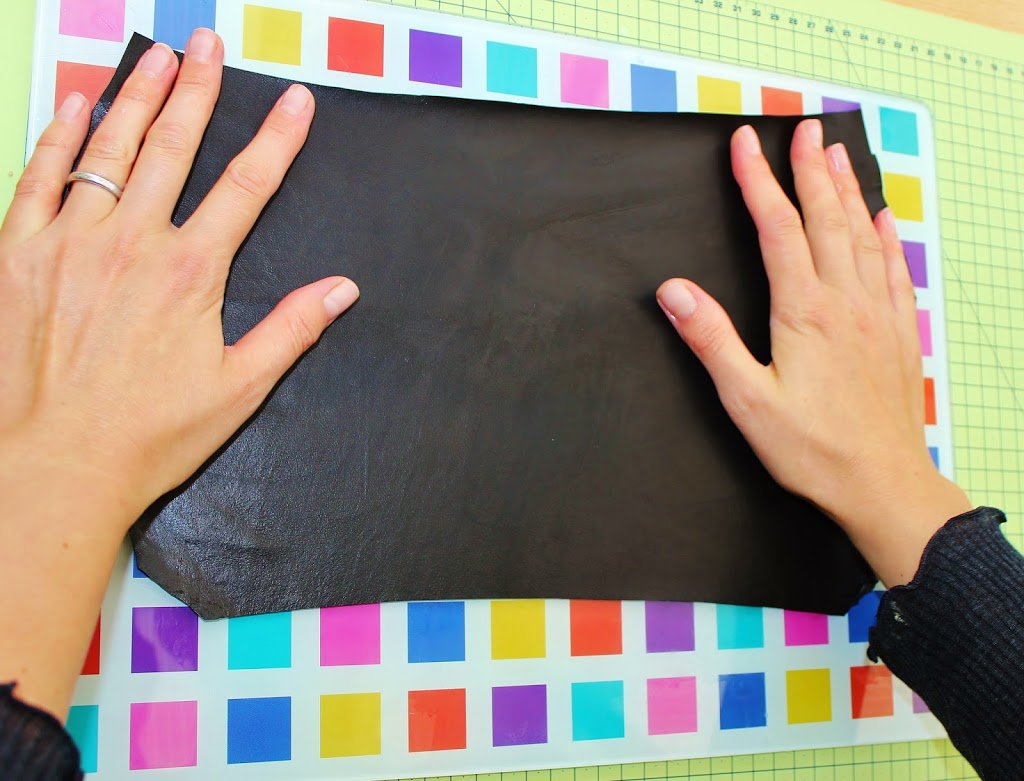
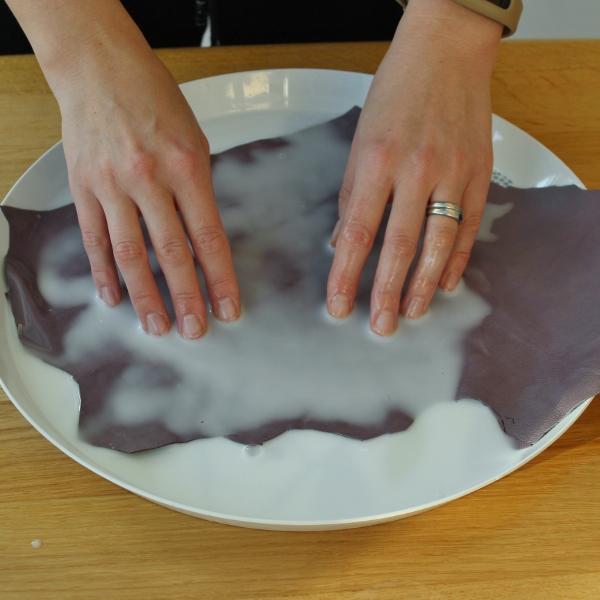
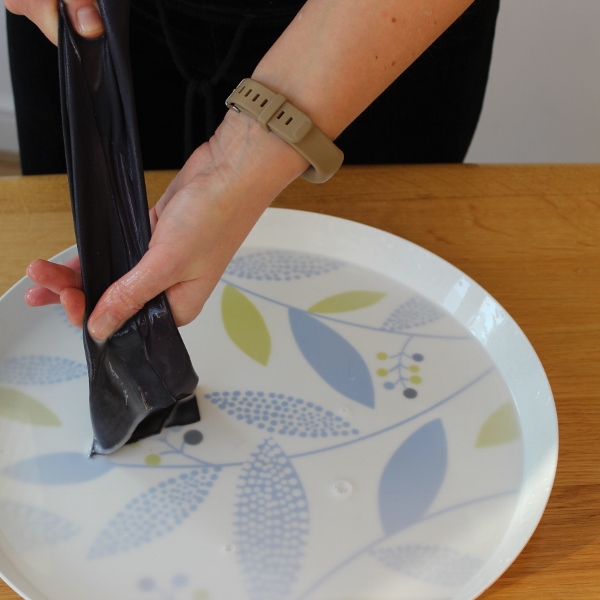
Stiffening leather tutorial

Those of you who have tried working with genuine leather know how temperamental it can be. Leather is a natural product and as a result may have imperfections such as holes or scars, the thickness and stretch can vary too. And it is completely unpredictable when it comes to shaping it with hot flower iron.
For my floral pieces I stiffen leather is several ways. Today I am going to share one of this ways with you. The result is a flat stiff piece of leather that can be shaped with a flower iron. I use flat stiff leather to make a range of flowers including my camellias, gerberas etc.So here is how I do it. But first of all the kit:

1. Measuring jug
2. A piece of genuine leather for stiffening
3. Bowl
4. White (PVA) glue
5. Measuring spoon
and a piece of plastic or a glass board as seen in the picture.
I use a rather thiсk PVA glue intended for craft purposes. The ratio of glue to water can be 1 part of glue  to 5 -10 parts of water depending on how thick your leather is or how tacky your glue is and how stiff you want the leather to be. You might need to experiment with the quantities, but the general guidelines are: the thicker the leather the weaker the solution (less glue). The ready to use solution should look like milk.

I use a measuring spoon to measure the amount of glue.

In the picture 10 ml of glue are being mixed with 100 ml of water.

Dissolve the glue in water to get a solution resembling milk. If you have sensitive skin consider wearing gloves.

Immerse the piece of leather (about A4 size or so) into the solution and make sure it is well soaked in it.

When the whole piece has been soaked, twist it to get rid of extra solution. The leather should be almost dry.

Then stretch it to make it even and thin it a bit more. I tend to use leathers with a thickness of 0.6-0.8 mm or so the sellers say but it is still rather thick for the flower making. Stretching the wet piece of leather in some cases makes it thinner but it all depends on the properties of the particular leather you are using.

I stretch in all directions: horizontally, vertically and diagonally.

With your both hands flatten the stretch piece of leather on the smooth flat surface (like this glass board).

Leave the flattened and smoothed piece of leather to dry completely before cutting and tooling it. It might take up to 24 hours.


stiffening leather


Coloured leather skins are rather delicate and may require more gentle handling than the black leather shown in the photos  above.

Consider using a large kitchen tray where you can place your leather in one layer. Place the piece of leather into the tray (either side up) and pour the warm stiffening solution over it. Let it soak for several minutes. Most probably you will need to help the leather get well saturated by gently rubbing the solution into the leather with your fingertips. Try to do it carefully to avoid making any marks or damage the surface of the leather.

stiffening leather


Once the leather has gone evenly darker all over its surface, lift it and gently squeeze any extra solution out of it by running it between your fingers. Then you can spread it onto a work surface or a glass table evenly as shown above and leave to dry completely.


leather dahlia brooch tutorial

I hope find this stiffening leather tutorial useful.

For more detailed instructions on how to stiffen coloured (especially pale) leather skins refer to our detailed LEATHER DAHLIA TUTORIAL.


Good luck with your stiffening!


You are welcome to follow me on Instagram here 

or become my patron on Patreon here 

Leather flowers to cater for all tastes this autumn

This week I have been working with leather. With autumn on our doorstep it seems to me to be the right material for flower making as silk flowers are more fragile and in a way more refined for decorating  outerwear.

I finished 2 brooches, both similar in shape but the colour schemes are very different.

The first floral brooch made of genuine beige leather will spice up your trench coat in classic beige shades. This leather flower also perfectly complements natural fabrics such as linen, cotton, raw silk, as well as straw and genuine leather and suede in light colours.
The diameter of the flower is about 9 cm.
Available for purchase from my Etsy shop

 For those of you who find the calmness of beige too boring I am offering this bright alternative: a floral brooch in intense colours to beat the autumn blues.
The flower is made of genuine suede of 2 hues: fuchsia for the petals and emerald green for the leaves. At the moment it is also available for purchase here.
Are you prepared for the coming autumn?

Leather rose

I am continuing my experiments with genuine leather, this rich and pliable material, great for making floral accessories.
As a part of my new capsule collection I have created 2 leather roses, different in size and shape.
The new collection called NATURALS will comprise of a range of accessories made using natural materials in natural colours and hues.
So the new roses (both corsages) are created using beige leather  and tan suede. They make an essential wardrobe addition for any girl who prefers natural fabrics such as linen, cotton, raw silk, as well as straw and genuine leather and suede in light colours.

The small closed rose is about 5 cm in diameter. It is finished with a brooch pin.

Small leather rose

The large open rose is complemented with tan-coloured leaves made of genuine suede.

Open leather rose corsage

It is finished with a brooch pin as well as the small one.

These unique leather corsages will make a lovely gift for your Mum, sister or a girlfriend. They are available from my Etsy shop.

If you are interested in learning how to make leather flowers or in purchasing a .pdf tutorial on leather flowers, please feel free to contact me via this blog, my Etsy store or e-mail me at svetlana.faulkner@gmail.com.

What about a leather flower?

I purchased some differently coloured leather pieces back in November and could not find time to turn them into flowers. Finally time has been chosen and last week I tried my luck in creating my first real leather flower. It is a cross breed between a rose and a camellia. Well I think it is a rose but my husband said it looked more like a camellia. It is made of greyish beige genuine leather including a pair of leaves. For the leaves to stand out and not to blend with the petals I tinted them lightly with a golden spray. The leather camellia is finished with a brooch pin (see pictures). I must say it is a perfect accessory for the winter period when silk flowers are somewhat fragile and light. The leather corsage would look good not only decorating an outfit, but a belt or a handbag too.
Here are some pictures of the leather camellia flower brooch

You can always order a custom flower from my Etsy shop.
Please stay updated with my latest news through my Facebook page
And a Happy New Year to you! 🙂